
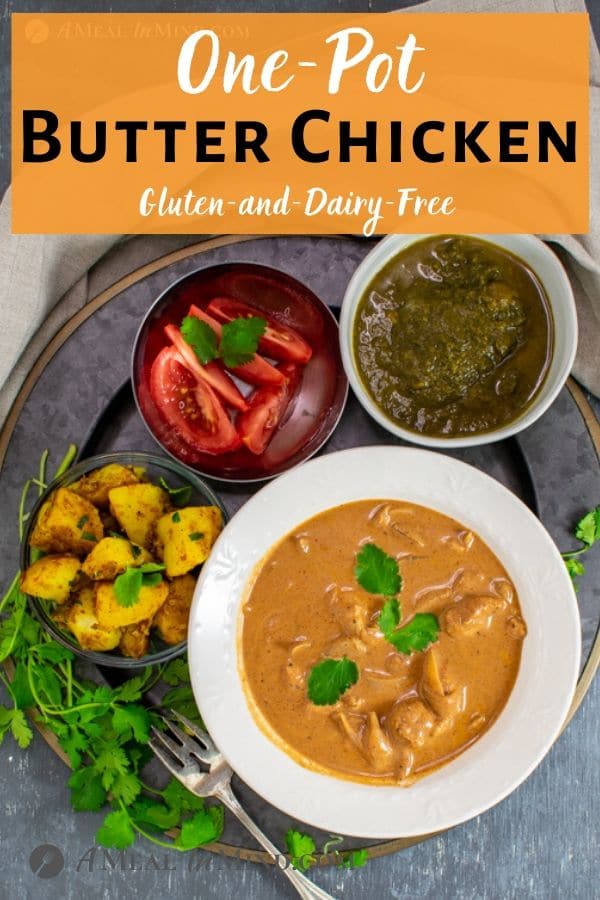
Introduction to One-Pot Butter Chicken
One-pot butter chicken is a revelation – a streamlined, intensely flavorful dish that transforms a typically involved Indian classic into a weeknight winner. Traditionally, making butter chicken requires a long simmer, careful layering of spices, and a hefty dose of patience. But this simplified recipe captures the essence of the dish without the time commitment. This method leverages the power of a single pot, concentrating the aromatic spices and allowing the flavors to meld beautifully as the tender chicken slowly cooks in a luscious, creamy sauce. The result is a dish that’s bursting with the rich, comforting tastes of butter, tomatoes, and warming spices – perfect for sharing with family and friends, or simply enjoying a delicious solo meal. The beauty of this one-pot recipe lies in its speed and efficiency; you’ll be enjoying a genuinely authentic butter chicken experience in under 30 minutes. It’s a fantastic option for those days when you’re short on time but still craving a vibrant, flavorful Indian dinner. Authentic Indian Flavors offers a similar concept, demonstrating how simple adjustments can yield incredible results. Furthermore, The Spruce Eats highlights the importance of building layers of flavor, a principle meticulously implemented in this streamlined method. This isn’t just about convenience; it’s about a truly satisfying and approachable way to experience the magic of butter chicken. Chicken Recipes are a staple, but this particular recipe focuses on minimizing the steps required to maximize the flavor. Quick Chicken Dinner Ideas showcases the incredible speed of this recipe, and our adapted version focuses on delivering a consistently delicious result. Indian Food Recipes shows how incredibly popular this dish is, and this recipe has been crafted to provide a truly authentic taste. This one-pot method is designed to elevate your weeknight cooking while retaining the soul of a true butter chicken classic – a delicious combination that makes it an essential addition to your repertoire. Easy Indian Recipes further emphasizes the simplicity of this style of cooking. Best Chicken Recipes demonstrates the popularity of using a single pot for convenient meal preparation.
Ingredients You’ll Need for This Recipe
Let’s gather everything you’ll need to create this incredibly flavorful and satisfying one-pot butter chicken. This recipe focuses on simplicity and quality ingredients, so don’t skimp! Here’s a detailed list:
- Chicken: Approximately 1.5 – 2 pounds of boneless, skinless chicken thighs (about 1-inch pieces) – Chicken thighs retain their moisture better than breasts during braising, crucial for a rich butter chicken.
chicken thighs[] - Onions: 2 medium yellow onions, finely chopped – The foundation of many flavorful dishes, onions caramelize beautifully and contribute a subtle sweetness.
yellow onions - Garlic: 6-8 cloves garlic, minced – Fresh garlic is essential for that pungent, aromatic flavor. Don’t use pre-minced garlic; it lacks the intense taste.
fresh garlic - Ginger: 1-2 inches fresh ginger, peeled and grated – Ginger adds warmth and a slight spicy kick to the dish, complementing the richness of the butter and cream.
fresh ginger - Tomato Paste: 6 ounces (about 1/2 cup) – Tomato paste concentrates the tomato flavor and provides a deep red hue to the sauce.
tomato paste - Diced Tomatoes: 1 (28-ounce) can of diced tomatoes, undrained – Adds acidity and texture to the sauce. Choose fire-roasted diced tomatoes for an extra layer of flavor! fire-roasted diced tomatoes
- Coconut Milk: 1 (13.5-ounce) can full-fat coconut milk – This is the secret ingredient that transforms the dish into a creamy, decadent butter chicken. Full-fat coconut milk is key for optimal richness.
full-fat coconut milk - Butter: 4 tablespoons unsalted butter – Adds richness and a velvety texture. Use good quality butter for the best flavor.
unsalted butter - Heavy Cream: 1/2 cup – This final addition amplifies the creaminess and adds a luxurious finish.
heavy cream - Spices:
- 1 teaspoon ground cumin – Adds warmth and earthiness.
- 1 teaspoon ground coriander – Provides a citrusy, slightly floral note.
- 1/2 teaspoon garam masala – A blend of spices that adds complexity and a subtle heat.
- 1/4 teaspoon cayenne pepper (optional) – For a touch of heat.
- Salt and black pepper to taste
- Fresh Cilantro: For garnish – Adds a bright, fresh flavor and a pop of color. fresh cilantro
Note: Measuring spoons and cups are essential for consistent results. Don’t be afraid to adjust the spices to your personal preference. This is a foundational recipe – feel free to experiment!
Step-by-Step Instructions for Perfect Butter Chicken
Let’s make this creamy, flavorful butter chicken! Here’s a breakdown of the process, designed to guide you to a truly satisfying meal.
1. Sauté the Aromatics: Begin by heating 2 tablespoons of coconut oil (or vegetable oil) in a large pot or Dutch oven over medium heat. Add 1 chopped yellow onion and 2 cloves of minced garlic. Sauté for about 5-7 minutes, stirring frequently, until the onions are softened and translucent. This initial sautéing is crucial for building the foundational flavors of the dish. flavor building
2. Add the Spices – The Key to Authentic Butter Chicken: Once the onions are softened, add 1 tablespoon of ground cumin cumin benefits, 1 tablespoon of ground coriander coriander uses, 1 teaspoon of garam masala garam masala composition, 1/2 teaspoon of turmeric powder turmeric health benefits, and 1/4 teaspoon of cayenne pepper (optional, for a touch of heat). Stir continuously for about 1 minute, allowing the spices to bloom and release their aromas. This step, called ‘blooming’ the spices, is critical for intensifying their flavor. spice blooming explanation
3. Incorporate the Chicken and Brown It: Add 1.5 – 2 pounds of boneless, skinless chicken thighs (cut into 1-inch pieces) to the pot. Stir to coat the chicken thoroughly with the spice mixture. Increase the heat to medium-high and cook the chicken, stirring occasionally, until it’s browned on all sides – about 5-7 minutes. Don’t overcrowd the pot; if necessary, brown the chicken in batches. Browning the chicken builds a rich, savory base for the sauce. chicken browning techniques
4. Add the Liquid and Simmer: Pour in 1 (14.5 ounce) can of full-fat coconut milk – don’t use light coconut milk, as it won’t provide the same richness. Add 1 cup of chicken broth (low-sodium is preferable) – broth alternatives . Bring the mixture to a gentle simmer. The coconut milk provides the creamy texture, and the chicken broth adds depth and moisture. If using tomato paste instead of tomatoes, add 2 tablespoons of tomato paste now. If using chopped tomatoes, add 1 (14.5 ounce) can of diced tomatoes, undrained. tomato paste benefits
5. Simmer Until Tender: Reduce the heat to low, cover the pot, and simmer for at least 20-25 minutes, or until the chicken is cooked through and very tender. Stir occasionally to prevent sticking. The longer it simmers, the more the flavors will meld together. simmering times for chicken
6. Finishing Touches (Optional): For an even richer flavor, you can stir in 1 tablespoon of honey or maple syrup during the last 5 minutes of simmering. Taste and adjust seasoning with salt and pepper as needed. flavor balancing techniques
7. Serving: Serve your delicious butter chicken hot, garnished with fresh cilantro leaves and a wedge of lime for an extra burst of flavor. It’s traditionally served with basmati rice and warm naan bread. rice pairings
To ensure optimal flavor development and texture, we recommend cooking this dish at least 30 minutes before serving, allowing the flavors to fully integrate. Enjoy your homemade butter chicken!
Tips & Techniques for the Best Flavor
To elevate your One-Pot Butter Chicken to truly exceptional levels of flavor, several key techniques and ingredient choices can make a significant difference. It’s not just about throwing everything into a pot; it’s about layering flavors and ensuring a rich, complex taste.
1. Building a Flavorful Base: The foundation of any great butter chicken is the aromatic base. Don’t rush this step. Start by gently heating a generous amount of ghee (clarified butter) – ghee has a higher smoke point and imparts a nutty richness that’s crucial – in a large, heavy-bottomed pot or Dutch oven. Add finely chopped onions and sauté them over medium heat until they are beautifully golden brown, often taking 10-15 minutes. The key here is patience; allowing the onions to caramelize properly concentrates their sweetness and creates a deeper flavor. A pinch of sugar helps encourage this caramelization. Once the onions are browned, add minced garlic and ginger – we recommend using fresh ginger for maximum impact – and cook for another minute until fragrant. ginger is particularly important for this dish.
2. Spice Blending – The Art of the Mix: Spice blends are where you truly customize your butter chicken. While the core spices – turmeric, garam masala, chili powder, and cumin – are essential, experimenting with variations is encouraged. For a more pronounced flavor, consider adding a pinch of ground cardamom, cloves, or mace. Building the spice blend gradually and blooming it in the hot oil is key. Add the spices incrementally, stirring constantly, to ensure they coat everything evenly and release their aromas fully. garam masala is a critical component and can vary significantly in flavor; choose one you enjoy! turmeric provides the signature yellow color and anti-inflammatory benefits, while chili powder dictates the level of heat. Don’t be afraid to adjust the quantities to your preference.
3. Marinating the Chicken – The Secret Weapon: Marinating the chicken before cooking unlocks incredible depth of flavor. A simple marinade could include yogurt (for tenderness), lemon juice, ginger, garlic, and a generous amount of spices. Marinate the chicken for at least 30 minutes, or even longer, for maximum penetration of flavor. yogurt tenderizes the meat and adds a creamy element to the sauce. If you have time, marinate the chicken overnight in the refrigerator.
4. Tomato Selection – From Paste to Crushed: The type of tomatoes you use significantly impacts the final flavor. While tomato paste provides concentrated tomato flavor, a combination of tomato paste and crushed tomatoes delivers a more complex taste. Using fresh, high-quality tomatoes, if available, is always a great choice. crushed tomatoes will give a more rustic flavor than a puree.
5. Simmering for Flavor Development: Allowing the butter chicken to simmer gently for an extended period (at least 30-45 minutes) is crucial for developing the sauce’s full flavor. This allows the flavors to meld together and the sauce to thicken naturally. Stir occasionally to prevent sticking. Adding a splash of coconut milk or cream towards the end of the simmering process adds richness and a velvety texture. coconut milk enhances the creaminess and complements the spices beautifully.
6. Finishing Touches: Don’t skip the finishing touches! A squeeze of fresh lime juice at the end brightens the flavors and adds a refreshing note. Fresh cilantro, chopped finely, adds a vibrant pop of color and herbaceousness. Garnishing with toasted almonds or cashews adds a delightful textural contrast. Finally, a sprinkle of freshly ground black pepper elevates the overall flavor profile.
Serving Suggestions & Garnishes
To truly elevate your One-Pot Butter Chicken experience, consider how you present and garnish this vibrant dish. The beauty of butter chicken lies not just in the flavor, but also in the visual appeal, and a thoughtfully chosen serving presentation enhances both. For a truly authentic Indian dining experience, you absolutely must serve your butter chicken with fluffy basmati rice – the long grains absorb the luscious sauce beautifully, and the subtle aroma complements the richness of the chicken. Rice selection offers a fantastic range of varieties, from classic long-grain to aromatic varieties like jasmine rice, which can also be a great choice.
Alongside the rice, a side of saag – a spinach-based Indian dish – is a traditional and incredibly satisfying pairing. Saag recipe provides a creamy and slightly bitter counterpoint to the richness of the butter chicken. The slight tang from the saag really balances the meal.
Fresh cilantro (coriander) is, of course, a must. A generous sprinkle of finely chopped cilantro adds a bright, herbaceous note and a pop of vibrant green to the plate. Cilantro benefits highlight its nutritional benefits too – it’s packed with vitamins and antioxidants!
For an extra layer of flavor and visual appeal, consider adding a dollop of plain yogurt or raita. Raita recipes offer a cool, tangy element that cuts through the richness, while also providing a nice textural contrast. You can even swirl a little mango chutney into the yogurt for a burst of tropical sweetness – a delightful addition, especially during the warmer months. Mango chutney recipe is a worthwhile consideration.
Finally, don’t underestimate the power of a simple garnish like toasted cumin seeds. Toasted cumin seed benefits – they add a subtle nutty aroma and a delicate crunch. A few slices of fresh lemon or lime can also brighten the flavors, adding a refreshing zest. Lemon zest recipes are a great resource for understanding how to use lemon zest effectively. Consider serving with naan bread for dipping and soaking up all that delicious sauce – Naan recipes offer guidance on perfecting this classic accompaniment. To truly make it special, a few thin slices of red onion can be added as a colorful garnish, offering a subtle sharpness. Presentation is key – using colorful serving dishes and thoughtfully arranged garnishes elevates the entire meal.
Storage & Reheating Instructions
Properly stored, this One-Pot Butter Chicken will keep in the refrigerator for up to 3-4 days. To store it, allow the chicken to cool completely before transferring it to an airtight container. For optimal freshness, use a container with a tight-fitting lid to prevent drying out. When it’s time to enjoy your delicious butter chicken again, reheating is crucial to maintaining its rich flavor and creamy texture. There are several methods you can use, each offering a slightly different result.
Reheating in the Oven: This is generally considered the best method for preserving the quality of the sauce. Preheat your oven to 350°F (175°C). Transfer the chilled butter chicken to an oven-safe dish. Cover tightly with foil. Bake for 20-30 minutes, or until heated through. Remove the foil for the last 5-10 minutes to allow the sauce to thicken slightly and the top to develop a lovely sheen. Watch carefully to ensure it doesn’t dry out – adding a tablespoon or two of coconut milk during the final baking step can help maintain the sauce’s lusciousness. This method is perfect for larger portions, as it heats evenly and doesn’t concentrate the flavors.
Reheating on the Stovetop: For a quicker reheat, you can use the stovetop. Place the chilled butter chicken in a saucepan over medium-low heat. Add about 1/4 cup of coconut milk or chicken broth to prevent sticking and to help rehydrate any slightly dry areas. Cover the saucepan with a lid and heat gently, stirring occasionally, until thoroughly heated through – about 10-15 minutes. Be mindful not to overheat, as this can cause the sauce to separate and become grainy. You can add a touch more coconut milk if needed to restore the desired creaminess.
Reheating in the Microwave (Use as a Last Resort): While not ideal, reheating in the microwave is the fastest option. Place the butter chicken in a microwave-safe dish. Cover with a damp paper towel to retain moisture. Heat on medium power in 1-minute intervals, stirring after each interval, until heated through. The texture can sometimes suffer slightly with microwave reheating, so it’s best reserved for smaller portions or when speed is paramount. Adding a splash of coconut milk during the final heating step can help mitigate this.
Important Note: Regardless of the reheating method you choose, always ensure the butter chicken is heated through completely to eliminate any potential food safety concerns. Internal temperature should reach 165°F (74°C) to guarantee it’s fully cooked. Enjoy your wonderfully reheated One-Pot Butter Chicken – it’s just as delicious the second time around! reheating coconutmilk chickenbroth richflavor flavorguide reheatmethods onepot_recipe
Frequently Asked Questions about Butter Chicken
Let’s address some common questions about making and enjoying this fantastic One-Pot Butter Chicken. It’s a recipe that often inspires questions, and we’re here to answer them.
Q: Can I use different types of coconut milk?
A: Absolutely! While full-fat coconut milk provides the richest flavor and creamiest texture – which we highly recommend for this recipe – you can experiment with light coconut milk to reduce the fat content. Just be aware that the final sauce might be slightly thinner. Alternatively, you could use a combination of full-fat and light coconut milk to get the best of both worlds.
Q: What if I don’t have a food processor for ginger?
A: No problem at all! You can easily grate fresh ginger by hand using a fine grater. Just peel the ginger root and grate it directly into the recipe. Alternatively, you can use a microplane for a more uniform consistency.
Q: How can I adjust the spice level?
A: This recipe is designed to be moderately spiced, but you can easily tailor it to your preference. To make it spicier, add a pinch of cayenne pepper, a finely chopped chili pepper (like a serrano or jalapeño), or a dash of your favorite hot sauce. For a milder flavor, omit the garam masala entirely, or use a smaller amount.
Q: Can I substitute other proteins?
A: While chicken is traditionally used, you can substitute it with other proteins, such as shrimp or tofu. Shrimp will cook quickly, so adjust the cooking time accordingly. For tofu, press it well to remove excess water, then cube it and add it towards the end of the cooking process. Tofu preparation is key for optimal texture.
Q: How long can I store leftover butter chicken?
A: Leftover butter chicken can be stored in an airtight container in the refrigerator for up to 3-4 days. The flavor actually improves slightly over time! Storage tips for Indian curries are generally applicable here.
Q: Can I freeze butter chicken?
A: Yes, you can freeze butter chicken for longer storage. Portion it out into freezer-safe containers or bags. It will keep well for up to 2-3 months. Thaw completely before reheating. Freezing and reheating curries provides valuable guidance for maintaining the quality of your curry during freezing.
Q: What is garam masala, and why is it important?
A: Garam masala is a spice blend that’s a cornerstone of many Indian dishes. It typically includes cardamom, cinnamon, cloves, cumin, coriander, nutmeg, and black pepper. It adds a complex aromatic flavor and warmth to the butter chicken. You can find it at most grocery stores, or you can make your own blend! Homemade garam masala recipe is a delicious option.
Q: Is it possible to make this vegetarian?
A: Absolutely! To make this recipe vegetarian, simply omit the chicken and add extra vegetables like cauliflower, peas, or spinach. Vegetarian Indian curry ideas offer further inspiration.
We hope these answers have cleared up any uncertainties you might have. Enjoy your flavorful One-Pot Butter Chicken!
 ,
, ,
,,
,
,
,
 ,
,,
