
Introduction: Achieving Fried Chicken Without the Fuss
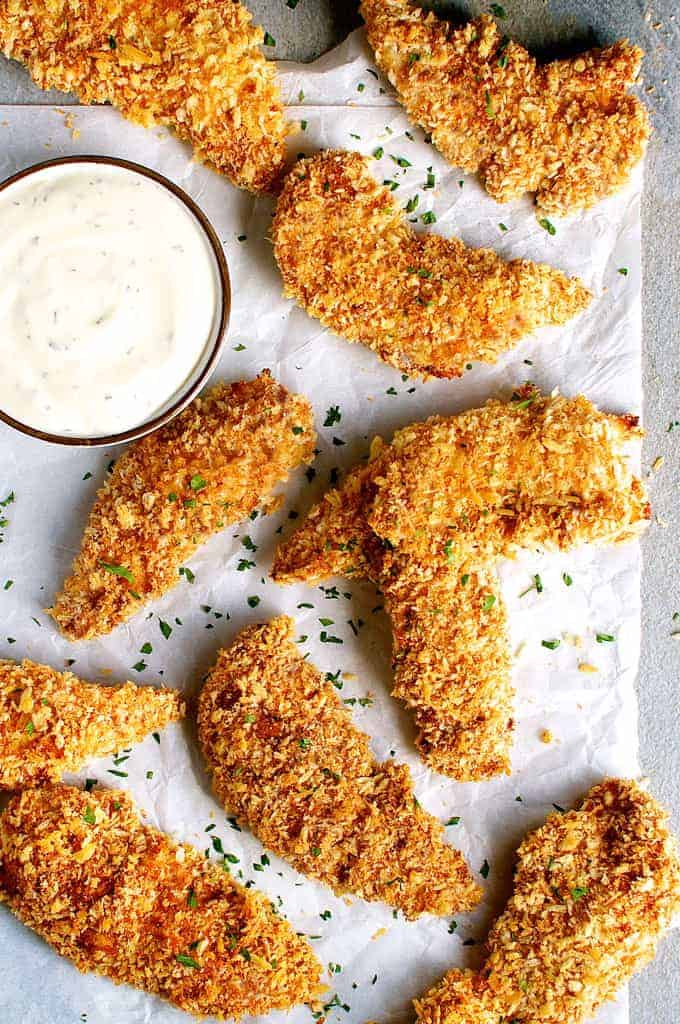
Let’s be honest, who doesn’t crave a juicy, crispy chicken tender, reminiscent of that beloved takeout experience? But the thought of deep-frying – the hot oil, the mess, the potential for burns – can be a major deterrent. Fortunately, you can achieve that same incredible texture and flavor with a surprisingly simple oven-baked method. These oven-baked chicken tenders deliver the satisfying crunch and incredible flavor of fried chicken, without any of the hassle. The key is understanding how to create a moisture barrier, preventing the breading from becoming soggy and ensuring those beautiful, golden-brown peaks you’re after. It’s a technique that transforms a potentially bland baked chicken into a culinary delight, perfect for busy weeknights or when you just want a little bit of takeout indulgence, but on your own terms. You’ll find that by properly preparing the chicken and utilizing a few clever techniques, you can truly replicate the experience of a perfectly fried chicken tender – a feat that many thought was impossible. Achieving this requires a focus on crispness, and these tenders, prepared correctly, offer just that. Crispy baked chicken tenders are a game changer for anyone who loves the taste of fried chicken but wants a much healthier and easier way to enjoy it. Chicken recipes can be challenging, but these are guaranteed to be a simple, tasty treat. Easy chicken dinners are always a good idea! And you’ll be so impressed with the results that you’ll be asking yourself, why didn’t I try this before? Chicken tender recipes are now a staple in our household. Chicken breast recipes can provide the perfect base for this dish. How to cook chicken is important to know! Best chicken recipes are always a good start. Chicken and rice casserole is a fantastic alternative when it’s a busy week.
Ingredients: What You’ll Need for Perfect Tenders
Let’s get started with the ingredients you’ll need to create these unbelievably crispy, oven-baked chicken tenders – a truly remarkable achievement considering they mimic the satisfying crunch of fried chicken without the added oil and mess. These tenders are designed to deliver maximum flavor while keeping things remarkably simple. You’ll be amazed at how quickly and effortlessly delicious these come together.
Here’s a detailed breakdown of everything you’ll require, and a little about why each component plays a crucial role in achieving that perfect, golden-brown, and deeply flavorful result. It’s important to use quality ingredients; the better the ingredients, the better your finished tenders will be!
-
Chicken Breast Tenders – These form the foundation, and the most important element. I recommend using approximately 1 – 1 ½ pounds of chicken breast tenders. The ‘tenderloin’ is that little piece that is usually attached to boneless skinless chicken breasts. You can also just buy boneless skinless chicken breasts and slice them yourself. Look for tenders that are relatively uniform in size for consistent cooking. The tenderness of the chicken itself significantly impacts the final result, so opting for a good quality cut is important. Choosing the right cut of chicken is important.
-
Flour + Spices: This isn’t just about seasoning; it’s about creating a robust crust. I add salt, pepper, garlic powder, onion powder, smoked paprika and Italian seasoning to my flour. Want some heat? Add a pinch of cayenne pepper. This blend builds a deep, savory flavor and provides the initial structure for the breading. Don’t be shy with the spices – a generous amount elevates the whole dish. Explore different spice blends for experimentation!
-
Eggwash – This is essential for binding the breading to the chicken and ensuring a consistently sticky coating. Place egg, water, and dash of hot sauce in a second shallow dish. Whisk to combine. You’ll need approximately 1 large egg and 1 tablespoon of water. The egg helps the breadcrumbs adhere, while the water prevents the breadcrumbs from drying out and becoming clumpy. Understanding the role of eggwash is key for perfectly coated chicken.
-
Breadcrumbs – Approximately 1 ½ cups of breadcrumbs – panko breadcrumbs are highly recommended for maximum crispiness. They offer a superior texture compared to regular breadcrumbs, contributing significantly to the shatteringly crunchy exterior. Different types of breadcrumbs will impact the final texture.
-
Vegetable Oil – About 2-3 tablespoons for greasing your baking sheet. Vegetable oil, canola oil, or even olive oil (though olive oil will impart a slightly different flavor) work well. Using a non-stick baking sheet is highly recommended to prevent sticking and ensure even browning. Choosing the right oil for frying will make a difference.
-
Optional – Seasoning Blend – Consider adding a pre-made seasoning blend (like poultry seasoning or a savory herb blend) to the breadcrumbs for an extra layer of flavor. This is entirely up to your taste preference. Explore seasoning blends!
Estimated Quantities Summary:
- Chicken Breast Tenders: 1 – 1 ½ pounds
- Flour: 1 cup
- Spices (Garlic Powder, Onion Powder, Smoked Paprika, Italian Seasoning, Cayenne Pepper – to taste)
- Egg: 1 large
- Water: 1 tablespoon
- Breadcrumbs (Panko Recommended): 1 ½ cups
- Vegetable Oil: 2-3 tablespoons
Step-by-Step Instructions: Baking the Crispiest Tenders
Let’s get started with baking these unbelievably crispy oven-baked chicken tenders! The key to achieving that satisfying, fried-chicken-like texture without all the oil is a systematic approach, and this recipe breaks it down perfectly. Follow these detailed instructions, and you’ll be enjoying tender, juicy chicken tenders in no time.
1. Prep Your Ingredients: Before you even start assembling, it’s crucial to have everything ready. This prevents frantic scrambling mid-recipe. Gather your chicken tenders – ideally, 1 ½ pounds should yield around 8-10 tenders. Don’t be afraid to buy them pre-cut; it saves a little time. Chicken tenders are the foundation of this delicious dish.
2. Creating the Coating – The Secret to Crispiness: This is where the magic happens. We’ll build a three-stage coating process.
-
Stage 1: The Flour Base: In a shallow dish, whisk together ¾ cup of all-purpose flour with a pinch of salt (approximately ¼ teaspoon), pepper (½ teaspoon), garlic powder (½ teaspoon), onion powder (½ teaspoon), smoked paprika (½ teaspoon – for that smoky flavor!), Italian seasoning (1 teaspoon) and a dash of hot sauce (1/2 teaspoon – optional, but it adds a nice kick!). This initial flour mixture ensures every tender gets a thorough coating. Flour is a key component.
-
Stage 2: The Wet Element: In a separate shallow dish, whisk together one large egg with about 1 tablespoon of water and a dash of hot sauce (½ teaspoon – you can adjust this to your liking!). This egg wash helps the flour stick and adds richness. Eggwash is essential.
-
Stage 3: The Extra Crunch: In a third shallow dish, combine 1 cup of panko breadcrumbs (or regular breadcrumbs if you prefer), ½ teaspoon of each salt, pepper, onion powder, garlic powder, smoked paprika and Italian seasoning and ¼ teaspoon of paprika. Panko is the secret weapon for maximum crispness – it’s a Japanese-style breadcrumb that’s lighter and fluffier than traditional breadcrumbs. Panko breadcrumbs are worth the investment for this recipe.
3. Coating the Tenders – The Final Assembly: Now, let’s assemble our crispy treats!
- Working one tender at a time, dredge it thoroughly in the flour mixture, shaking off any excess. Chicken tenders are coated from all angles.
- Next, dip the floured tender into the egg wash, ensuring it’s completely covered.
- Finally, press the tender into the panko breadcrumb mixture, completely coating it. Make sure every surface is covered with breadcrumbs. Press firmly to help the breadcrumbs adhere. Repeat with the remaining tenders.
4. Baking to Perfection:
- Preheat your oven to 400°F (200°C). Make sure your oven is fully heated before placing the tenders in.
- Line a baking sheet with parchment paper. This prevents the tenders from sticking and makes cleanup a breeze. Parchment paper is invaluable.
- Arrange the coated tenders in a single layer on the baking sheet, making sure they aren’t overcrowded. Overcrowding will steam the tenders and prevent them from getting crispy. Baking sheet is also beneficial.
- Bake for 18-22 minutes, flipping the tenders halfway through (around 10 minutes) to ensure even cooking and crispness on both sides. Keep an eye on them – cooking times may vary slightly depending on your oven. Oven temperatures are critical.
5. Resting and Serving:
- Once the tenders are golden brown and crispy, remove them from the oven and let them rest on the baking sheet for a few minutes before serving. This allows the juices to redistribute, resulting in more tender chicken. Resting meat is a great technique.
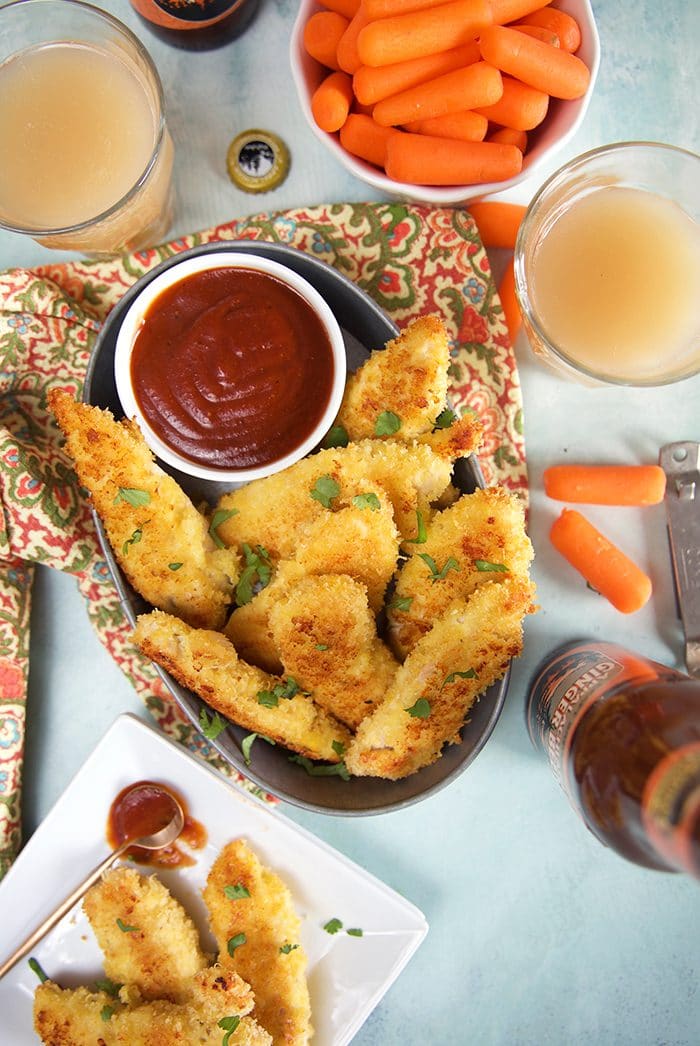
Enjoy your incredibly crispy, oven-baked chicken tenders! They’re perfect on their own, served with your favorite dipping sauces (BBQ sauce, honey mustard, ranch) or alongside a side of roasted potatoes or a simple salad. Chicken tenders
Expert Tips & Tricks: Maximizing Crispness and Flavor
Achieving that perfectly crispy, fried-chicken-like texture with oven-baked tenders is all about strategic techniques. It’s not just about throwing them in the oven; it’s about understanding how heat and moisture interact with the breading. Here’s a breakdown of the key secrets, designed to elevate your baked tenders from good to genuinely crave-worthy.
1. The Wire Rack is Your Best Friend: As previously mentioned, baking chicken tenders directly on a baking sheet will almost always lead to soggy bottoms and unevenly cooked results. The key is a wire rack placed on a rimmed baking sheet. This allows air to circulate around the tenders, preventing direct contact with the hot surface and ensuring uniform crisping. A rack effectively elevates the tenders, promoting even heat distribution and reducing the stickiness that occurs when food sits directly on a hot surface. Investing in a wire rack for roasting pans or a jelly roll pan with a rack is a small investment that yields a massive difference in the final product. Consider this – the surface area of the tenders touching the baking sheet is significantly reduced when they are on a rack, leading to a more consistent level of crispness. Plus, it makes for easier cleanup!
2. Don’t Overcrowd the Pan: Resist the urge to cram too many tenders onto your baking sheet. Overcrowding dramatically reduces air circulation, leading to steam buildup, and – you guessed it – soggy tenders. Leave space between each piece for optimal air flow. A good rule of thumb is to work in batches. You can even freeze cooked tenders for future use. Here’s a guide on freezing chicken tenders.
3. The Double-Dipping Method for Maximum Breading Adhesion: The key to a truly crispy coating isn’t just applying the breading; it’s ensuring every single surface is thoroughly coated. This is where the double-dipping method comes in. Instead of just dunking each tender once, dip it in the flour, then the egg, and then the panko breadcrumbs. This builds up a thicker layer of breading that remains intact during baking. Additionally, a quick rinse between the flour and eggwash can help remove excess starch and promote a stronger bond. Consider this – starch is what creates the initial stickiness, so removing excess starch after the first dip creates a better foundation for the final breading.
4. The Ice Water Trick (for the Eggwash): Adding a tablespoon or two of ice-cold water to your eggwash (egg + a splash of water) helps to temper the egg, creating a thinner, more fluid mixture. This thinner mixture penetrates the breading more effectively, creating a stronger and crispier crust. The chilling effect also slows down the coagulation of the egg, allowing for a smoother and more consistent coating. This article explains how cold water affects eggwash.
5. The Final Bake – High Heat and Short Time: After the double-dipping and eggwash, bake at a higher temperature – around 400°F (200°C) – for a shorter time – 15-20 minutes, flipping halfway through. High heat is crucial for rapid drying of the breading, which is what creates the crispy exterior. A longer baking time at a lower temperature will lead to a softer, less crispy result. Keep a close eye on them – you want a golden-brown crust, not burnt breading. Consider using a meat thermometer to ensure the internal temperature reaches a safe 165°F (74°C).
6. Resting Period (Optional, But Recommended): Once out of the oven, let your tender rest for 5-10 minutes. This allows the internal juices to redistribute and the crust to set fully. Don’t skip this step – it’s a simple trick that significantly impacts the tenderness of the meat.
By meticulously following these techniques, you’ll consistently achieve oven-baked chicken tenders that rival the crispiness of their fried counterparts. Don’t be afraid to experiment and find what works best for your oven. Happy baking!
Serving Suggestions: Sides and Dipping Sauces
Elevating your oven-baked chicken tenders isn’t just about the tenders themselves; it’s about crafting a complete and satisfying meal. The right sides and dipping sauces can truly transform the experience. Let’s explore some fantastic pairings to complement the crispy, flavorful chicken.
Classic Sides:
- Mashed Potatoes: A creamy, buttery mashed potato dish is a timeless companion to chicken tenders. You can keep it simple with a classic recipe or add roasted garlic for an extra layer of flavor. Creamy mashed potatoes are a fantastic choice. Potatoes are also a nice option.
- Mac and Cheese: The ultimate comfort food! A gooey, cheesy macaroni and cheese is a guaranteed hit, particularly with kids. Mac and Cheese is a great, fast option.
- Green Beans: A simple, healthy side that offers a nice contrast to the richness of the chicken. Green beans are always a good choice.
- Corn on the Cob: Grilled or boiled corn on the cob adds a touch of sweetness and a satisfyingly crunchy texture. Corn on the cob is a popular and easy side dish.
Dipping Sauces for Maximum Flavor:
- Ranch Dressing: A classic for a reason! The cool, tangy flavor of ranch dressing perfectly cuts through the richness of the chicken tenders. Homemade Ranch Dressing is a great option to make yourself.
- BBQ Sauce: Sweet, smoky, and tangy – BBQ sauce is a match made in heaven with chicken tenders. BBQ Sauce Recipes offer various flavor profiles, from classic Kansas City to Memphis style.
- Honey Mustard Sauce: The combination of sweet honey and tangy mustard is surprisingly delicious with chicken. Honey Mustard Recipe will help you get this great sauce.
- Ketchup: A simple yet satisfying choice, particularly for those who enjoy a sweeter flavor. Ketchup recipes provide different flavor profiles.
- Spicy Mayo: A creamy, slightly spicy mayonnaise adds an exciting kick. Spicy Mayo Recipe is a great option.
Beyond the Basics:
- Coleslaw: A crunchy, tangy coleslaw adds a refreshing element to the meal. Easy Coleslaw Recipe.
- Fruit Salad: A light and fruity salad offers a welcome contrast to the savory chicken. Fruit Salad Recipes.
No matter your preference, experimenting with different sides and dipping sauces will take your oven-baked chicken tenders to the next level. Don’t be afraid to get creative and discover your own perfect pairings. Consider the season – a summer barbecue might call for a watermelon salad, while a chilly evening might pair well with a warm, cheesy macaroni and cheese. Enjoy!
Favorite Chicken Recipes: Expanding Your Chicken Menu
Looking for more ways to enjoy delicious chicken? Beyond oven-baked tenders, the world of chicken recipes is vast and exciting! From comforting casseroles to vibrant salads and flavorful crockpot creations, there’s a chicken dish to satisfy every craving. Let’s explore some fantastic chicken recipes to elevate your meal rotation.
Chicken and Rice Casserole: This classic comfort food is a crowd-pleaser. Combining tender chicken with fluffy rice, creamy sauce, and your favorite veggies, it’s a simple yet satisfying dinner. Easy Chicken and Rice Casserole is a fantastic place to start – it’s remarkably easy, taking only about 30 minutes to prepare.
Avocado Chicken Salad Sandwiches: For a lighter, fresher option, try our Avocado Chicken Salad Sandwiches. This vibrant salad combines shredded chicken with creamy avocado, crisp vegetables, and a tangy dressing – all served on your favorite bread. Avocado Chicken Salad Sandwiches is a flavorful and healthy choice.
Crockpot Mushroom Chicken: Weeknight dinners don’t have to be stressful! Our Crockpot Cream of Mushroom Chicken is a set-it-and-forget-it meal. Tender chicken simmered in a rich mushroom sauce is incredibly easy to make, and the aromas will fill your home with comfort. Easy Crockpot Cream of Mushroom Chicken is a winning recipe for busy families.
Chicken Pot Pie: Transport yourself to a cozy kitchen with this classic Chicken Pot Pie. A flaky, golden-brown crust encases a savory filling of chicken, vegetables, and a creamy gravy. Chicken Pot Pie Recipes provides great instructions and inspiration.
Lemon Herb Roasted Chicken: For a bright and flavorful dish, try roasting a whole chicken with lemon and herbs. Lemon Herb Roasted Chicken Recipes will guide you to a mouth-watering feast.
Chicken and Vegetable Skewers: Summer grilling just got easier with these Chicken and Vegetable Skewers. Marinate chicken pieces with your favorite herbs and spices, then thread them onto skewers with colorful vegetables. Chicken Skewers Recipes offers a great way to enjoy fresh, seasonal ingredients.
Chicken Fajitas: A truly easy and fun meal the whole family can enjoy. This classic meal is a favorite because it’s so quick to prepare. Chicken Fajita Recipes provides everything you need to get started.
Expanding your chicken repertoire doesn’t have to be complicated. These are just a few starting points – there’s a world of chicken recipes out there waiting to be discovered! Don’t be afraid to experiment with different flavors and cuisines to find your new favorite chicken dish. More Chicken Recipes gives you access to many more options.
Recipe Nutrition: Nutritional Information Breakdown
Let’s dive into the nutritional details of these incredibly satisfying oven-baked chicken tenders. A single serving (calculated based on a recipe yield of 4 servings) contains approximately 164 calories, 24 grams of carbohydrates, 7 grams of protein, and 3 grams of fat. While that might seem straightforward, it’s important to note that these numbers can fluctuate slightly depending on the exact quantities used and variations in ingredient brands. Calories are largely driven by the panko breadcrumbs and the fat content of the chicken itself, which is generally lean.
Macronutrient Breakdown (per serving):
- Carbohydrates: 24g – Primarily from the panko breadcrumbs and a small amount from the flour. This contributes to the tenderness and helps create the crispy exterior. Understanding Carbohydrates is key to a balanced diet.
- Protein: 7g – The chicken tenderloin provides the bulk of the protein, essential for muscle repair and growth. Protein Sources are vital for overall health.
- Fat: 3g – Mostly from the panko breadcrumbs and any minor fat present in the chicken. Don’t be alarmed by this – the crispiness and flavor come from the fat, and a small amount is perfectly acceptable. Healthy Fats are beneficial for the body.
Vitamins and Minerals (approximate per serving):
- Vitamin A: 235 IU – Found in chicken and spices like paprika, contributes to vision and immune function. Vitamin A Benefits are a vital nutrient.
- Calcium: 109mg – Contributed primarily by Parmesan cheese (if used), important for bone health. Calcium Rich Foods is often overlooked.
- Iron: Approximately 2mg – Found in chicken, contributes to oxygen transport throughout the body. Iron Deficiency Symptoms is common and can be addressed through dietary changes.
Sodium Content: The sodium content is relatively low, primarily coming from added spices and any sodium present in the panko breadcrumbs. Generally, a serving contains around 150-200mg of sodium, depending on the specific spices used. Sodium Reduction Strategies are often recommended for overall health.
Important Note: These figures are estimates only. To get a more precise nutritional breakdown, you can use a recipe analyzer tool or manually input the ingredients and quantities into a nutritional database. Remember to adjust your portion sizes to align with your individual dietary needs and goals. Calculating Calories can help you track your caloric intake. Enjoy these delicious and guilt-free oven-baked chicken tenders!
 ,
, ,
,:max_bytes(150000):strip_icc()/baked-chicken-tenders-hero-05-265014-4000x2700-b45e5e13a3f749089d2400dee566755a.jpg) ,
, ,
, ,
, ,
, ,
, ,
,