Introduction: Surprisingly Simple Chicken Strips
I used to think making chicken strips was a monumental task – a recipe for frantic grocery runs, messy kitchens, and a serious commitment of time and energy. The idea of perfectly formed, crispy chicken tenders seemed, frankly, impossible for a busy weeknight. But let me tell you, that perception was completely wrong! These Baked Coconut Chicken Strips are a testament to the fact that you don’t need fancy ingredients or complicated techniques to create a genuinely delicious and satisfying meal. Simple weeknight meals shouldn’t be stressful, and these strips prove it. They’re an accident in the best possible way, born from a genuine ‘what if’ moment, and they’ve quickly become a staple in our household. The beauty of this recipe lies in its deceptive simplicity. It relies on a few key steps – a quick coating and a careful bake – but the results are anything but basic. You’ll be amazed at how quickly and effortlessly you can transform humble chicken breasts into these golden, crispy bites. Plus, they’re unbelievably versatile! Serve them alongside roasted vegetables for a complete dinner, pack them into lunchboxes for healthy lunch ideas, or even use them as a fun and easy appetizer. The fact that they’re gluten-free and naturally low in fat makes them a guilt-free choice, perfect for families with dietary restrictions or anyone looking to eat a little healthier without sacrificing flavor. Seriously, anyone can make these. They’re perfect for a beginner cook, or even a seasoned pro looking for a quick and rewarding recipe. Don’t let the ‘chicken strip’ label intimidate you; the preparation is really quite straightforward. Easy recipes don’t always have to be complicated – and these definitely prove that point.
The Health Benefits: Lean Protein & Good Fats
Let’s be honest, when you think of chicken strips, you might picture deep-fried treats laden with saturated fat. But these Baked Coconut Chicken Strips are a surprisingly healthy alternative, packed with nutrients and delivering a satisfying crunch without the guilt. The foundation of their goodness lies in the chicken itself – boneless, skinless chicken breasts are an excellent source of lean protein, crucial for building and repairing tissues, and supporting overall muscle health. A diet rich in protein can also help you feel fuller for longer, potentially aiding in weight management. But it doesn’t stop there. The coconut coating is where the real magic happens from a nutritional standpoint. Unsweetened shredded coconut isn’t just a delicious addition; it’s a source of medium-chain triglycerides (MCTs), a type of fat known for its potential to boost energy levels and support brain health. Coconut also contains fiber, which contributes to digestive health and helps you feel satisfied after eating. And let’s not overlook the fact that coconut oil, the primary fat component of the coating, is rich in monounsaturated fats – these fats are considered ‘good’ fats, known to be beneficial for heart health by helping to lower LDL (bad) cholesterol levels. Furthermore, coconut contains trace amounts of lauric acid , a saturated fatty acid that may have antimicrobial properties. These strips offer a great balance of protein and healthy fats, creating a meal that’s not just tasty but also beneficial for your well-being. Choosing these baked strips over traditional fried versions significantly reduces your intake of unhealthy fats, making them a smart choice for anyone focused on a heart-healthy diet or simply looking for a nutritious and flavorful meal. The key here is moderation, of course, enjoying these as part of a balanced diet, but recognizing their positive nutritional profile is a significant advantage. It’s a win-win – a delicious treat and a boost for your health. Don’t underestimate the power of smart ingredient choices, and these coconut chicken strips perfectly illustrate that.
Coating the Strips: A Step-by-Step Guide for Perfect Texture
Getting the coating right on these Baked Coconut Chicken Strips is key to achieving that satisfying, almost-fried texture without all the added oil and fuss. It’s remarkably simple, but a few small details make a huge difference. Let’s break down the process to ensure you get perfectly crispy chicken strips every time.
First, you’ll need three shallow dishes. The first should be a wide, shallow dish—think about 8-10 inches in diameter—for whisking your egg wash. We’re using 2 large eggs, whisked together with ½ teaspoon of salt and ½ teaspoon of freshly ground black pepper. The pepper adds a subtle warmth that complements the coconut beautifully. Don’t over-whisk; just enough to ensure the yolks and whites are fully combined.
Next, prepare a third dish, also relatively wide and shallow, for your coconut coating. This is where the magic happens! You’ll combine 1 ½ cups of unsweetened shredded coconut with ½ teaspoon of dried thyme – a wonderful herb that adds a slight earthiness – and ½ teaspoon of ground cumin. Cumin is a fantastic spice that delivers a gentle warmth and savory depth to the overall flavor profile. The key here is to ensure the coconut is evenly distributed. You want every strand coated with the spices for maximum flavor in every bite. Don’t be tempted to add more coconut just to have something to work with; the right amount provides the texture. A little goes a long way.
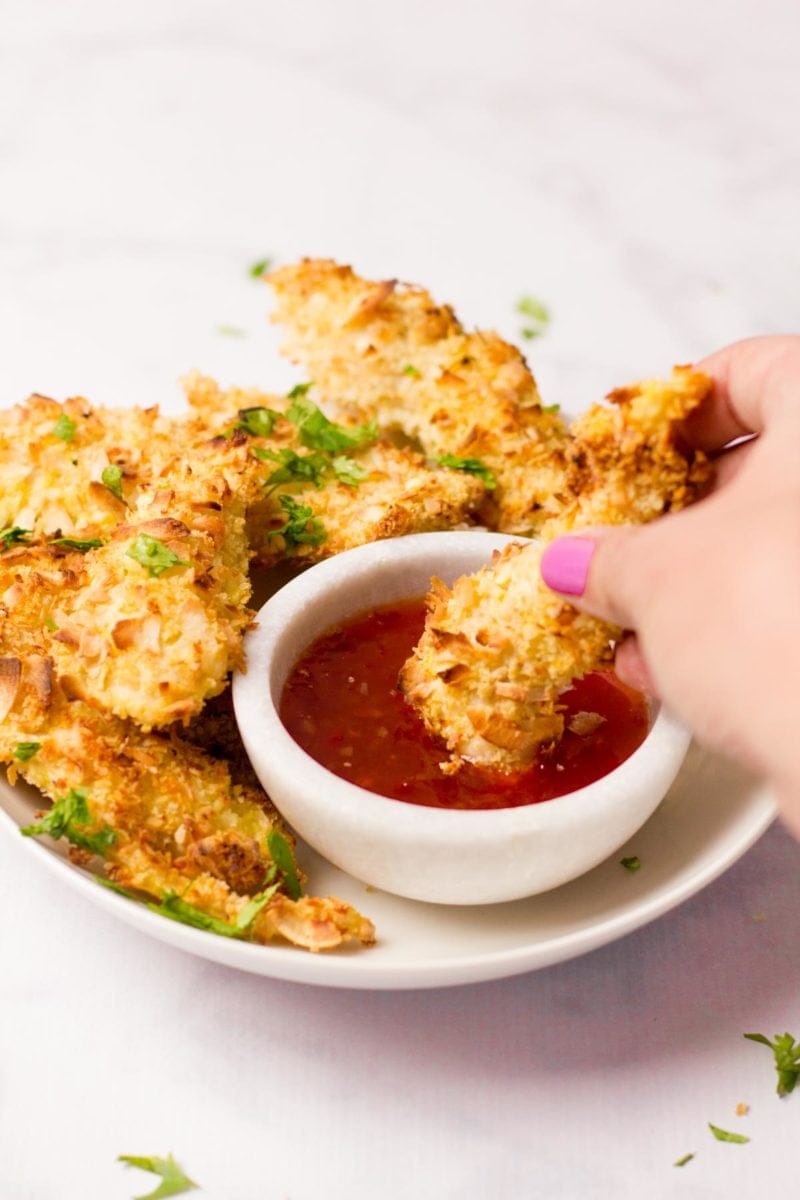
Now for the crucial part: the dipping! This is where your “wet hand” and “dry hand” technique comes into play. Using one hand (let’s call it your ‘wet hand’), reach in and fully submerge one chicken strip into the egg wash, ensuring it’s completely coated. Then, gently shake off any excess egg wash. You don’t want a soggy strip. Now, using your other hand (your ‘dry hand’), grab another strip and coat it in the coconut mixture, pressing firmly to ensure the coconut adheres evenly. It’s important not to double-dip; this prevents the coconut from becoming too wet and falling off. A little moisture is okay, but excessive wet coconut will lead to a less-than-perfect coating.
Once you’ve coated a strip with both the egg and coconut, lay it gently onto a baking sheet lined with parchment paper. The parchment paper prevents the strips from sticking and makes cleanup a breeze. Continue this process, working with one strip at a time and alternating between your wet and dry hands. Space the strips on the baking sheet, but don’t overcrowd them. Overcrowding is the enemy of crispy chicken! Ensure there’s enough space between each strip so air can circulate freely.
If you’re prepping these chicken strips in advance (meal prep!), remember to re-heat them in the oven rather than the microwave to maintain that crucial crispness. Microwaving tends to make everything soggy. Aim for 375°F (190°C) for about 10-15 minutes, flipping the strips halfway through. The goal is to re-dry and re-crisp the coating, not steam the chicken. You can find some fantastic tips on meal prepping healthy lunches here [for further inspiration].
Finally, remember that patience is key! Don’t rush the coating process. A few extra minutes spent carefully applying the egg and coconut will dramatically improve the final texture. Investing a little time upfront will pay off in delicious, perfectly textured chicken strips that everyone will love. For a deeper dive into crisping up your foods, check out this guide here. It highlights some brilliant techniques that apply to a variety of dishes.
Crispy Coating Secrets: Achieving Deep-Fried Results Without the Oil
Let’s be honest, when you crave chicken strips, you’re often picturing that gloriously crispy, golden-brown exterior – the kind that practically melts in your mouth. But achieving that texture without deep-frying, loaded with saturated fats, can feel like a significant challenge. The key lies in maximizing airflow during the cooking process. Deep frying relies on direct contact with hot oil to rapidly cook the exterior and create that characteristic crunch. Baking, however, doesn’t offer that direct heat, so we need to engineer a system that mimics it.
Firstly, don’t overcrowd the baking sheet. This is absolutely crucial. When you stack too many chicken strips on one tray, the heat struggles to circulate effectively. The moisture from the strips creates steam, which then hits the hot surface and forms a soggy layer, preventing the coating from crisping up properly. Instead, aim for generous space between each strip – at least 3-4 inches is recommended. Think of it like a well-ventilated oven, allowing hot air to circulate freely around each piece of chicken.
Secondly, the type of coating itself plays a significant role. While the recipe utilizes unsweetened shredded coconut, which adds a delicious flavor and helps with browning, the consistency is vital. Too much moisture in the coating will lead to steam formation, as discussed. Ensure the coconut is relatively dry before applying it to the chicken. If you find your coconut is particularly moist, you can gently pat it dry with a paper towel. Consider chilling the coconut for 15-20 minutes before use; this will firm it up slightly.
Another technique that works wonders is using a wire rack placed on top of the baking sheet. This elevates the chicken strips, allowing hot air to circulate beneath them, further enhancing the crisping effect. You can purchase these wire racks online wire racks or at most kitchen supply stores.
Furthermore, after the initial baking phase (around 10 minutes), flipping the chicken strips is important. This ensures that both sides are exposed to the heat source, promoting even browning and crisping. Don’t be tempted to flip them repeatedly – just one flip is sufficient.
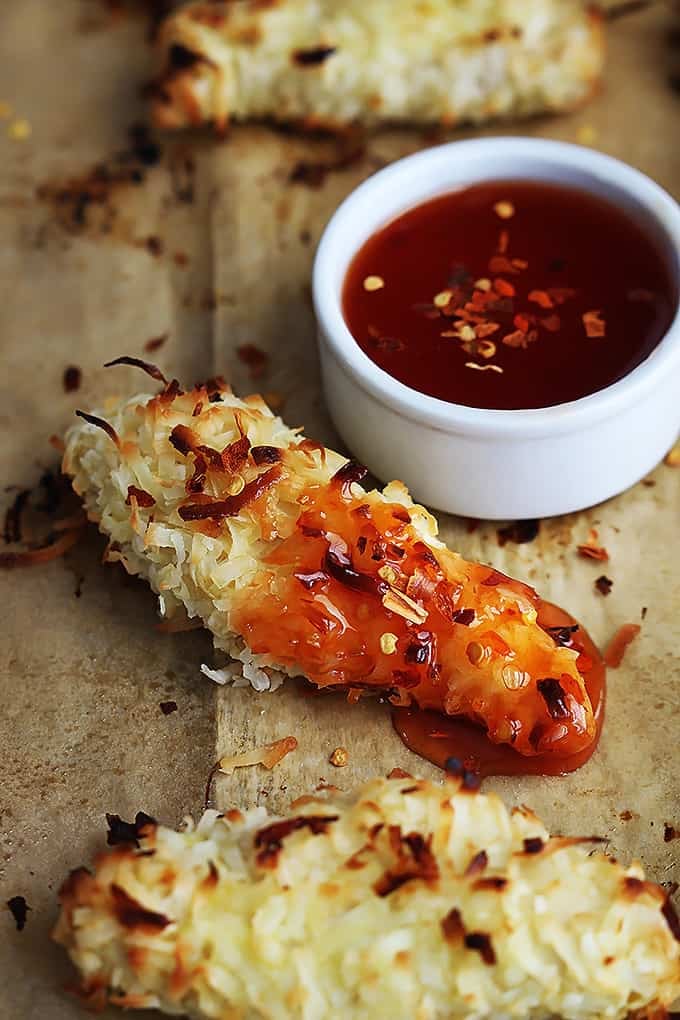
Finally, a higher oven temperature – around 425°F (220°C) – can significantly contribute to the crisping process. This increased heat creates more rapid steam formation, which, when combined with the airflow, dramatically improves the texture of the coating. Just be mindful of watching them carefully to prevent burning. You can learn more about oven temperatures oven temperature guide for accurate measurements.
By combining these techniques – generous spacing, a wire rack (optional but recommended), flipping, and a slightly higher oven temperature – you can replicate the satisfying crunch of deep-fried chicken strips without any of the unhealthy fats. The result is a delicious and guilt-free treat. You might also find helpful information about baking times baking times guide.
Baking Instructions: Timing & Temperature for Optimal Results
Achieving perfectly baked coconut chicken strips is all about finesse – understanding how heat and time interact to deliver a crispy exterior and juicy interior. Don’t be intimidated by the seemingly simple baking process; with a few key adjustments, you’ll be serving up these delicious strips in no time.
Temperature is Key: The oven temperature plays a monumental role. We’re aiming for a consistent 400°F (200°C), which is crucial for creating that satisfying crunch. Lower temperatures can lead to soggy strips, while excessively high heat can result in burnt edges and an undercooked center. Maintaining a steady temperature is paramount. Using an oven thermometer is highly recommended to ensure accuracy – ovens can vary significantly in their actual temperature compared to what the dial indicates.
Timing – The First 10 Minutes: Start by placing your coated chicken strips onto a baking sheet lined with parchment paper. This prevents sticking and makes cleanup a breeze. Bake for approximately 10 minutes. This initial stage is critical for setting up the initial structure of the chicken, allowing the outer layers to begin to firm up slightly without overcooking the inside. You should start to see a light golden-brown color developing on the edges of the strips – this indicates that the heat is doing its work.
The Flip & Second 10 Minutes: After the first 10 minutes, carefully flip each chicken strip using tongs. Don’t overcrowd the baking sheet; if necessary, work in batches. This flipping is absolutely essential to ensure even cooking on all sides. Continue baking for another 10 minutes. During this second phase, the sugars in the coconut and the moisture released from the chicken will caramelize, further intensifying the flavor and contributing to that desirable golden-brown color. Keep a close eye on them; the exact timing can vary depending on your oven and the thickness of the strips.
Doneness Check: The most reliable way to determine if your chicken strips are done is by using a meat thermometer. Insert the thermometer into the thickest part of a strip – it should register 165°F (74°C). Alternatively, you can gently press on a strip; it should spring back readily, indicating that it’s cooked through. Overcooked chicken strips will be dry and tough, so err on the side of slightly undercooking them – they will continue to cook slightly as they rest.
Resting is Important: Once the strips are cooked through, remove them from the oven and place them on a wire rack to rest for 5-10 minutes before serving. This allows the juices to redistribute throughout the meat, resulting in juicier and more flavorful chicken strips. Resting also helps the internal temperature equalize, making them easier to cut and serve. Don’t skip this step – it truly makes a difference! Resting times are also important to know for the full culinary experience.
Meal Prep Ideas: Lunchbox-Ready Chicken Strips
Turning these Baked Coconut Chicken Strips into a meal prep powerhouse is incredibly easy, making them perfect for busy weeknights or grab-and-go lunches. They’re remarkably versatile – fantastic for packing into kids’ lunchboxes, prepping for work, or even fueling a weekend hiking trip. The key to maximizing their meal prep potential lies in how you store and reheat them.
Storage: Once cooled completely, store the chicken strips in an airtight container in the refrigerator for up to 4 days. This helps maintain their texture and prevents them from drying out. For longer storage, consider freezing them – they freeze incredibly well! Simply arrange the strips in a single layer on a baking sheet, freeze for about 2 hours, then transfer to a freezer-safe bag or container. Frozen chicken strips can be stored for up to 2-3 months.
Reheating Options: Reheating these baked chicken strips is crucial to maintaining their crispness. The microwave is an option, but it’s prone to making them soggy. Instead, opt for these methods:
- Oven: The best method for reheating! Spread the chicken strips on a baking sheet and reheat in a preheated oven at 350°F (175°C) for 8-10 minutes, or until heated through. This gentle heating prevents the coconut coating from becoming overly soft.
- Air Fryer: For an even crispier result, use an air fryer! Preheat to 400°F (200°C) and reheat for 5-7 minutes, shaking the basket halfway through to ensure even heating. This mimics the baking process and gives you that satisfying crunch.
- Toaster Oven: Similar to the air fryer, a toaster oven will help retain the crispness of the coating.
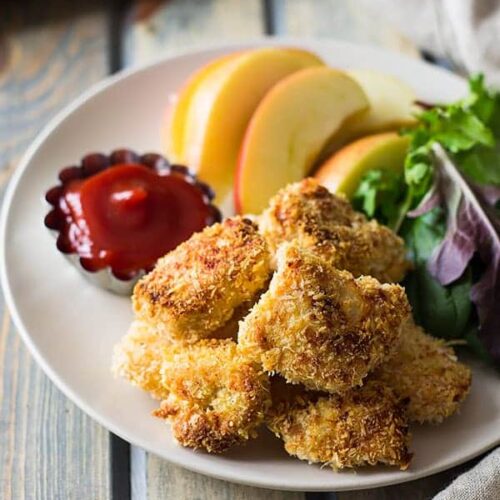
Beyond Lunchboxes: These baked coconut chicken strips aren’t just limited to lunchboxes. They’re fantastic for adding a healthy and flavorful side to dinner. Serve them alongside a simple salad, steamed vegetables, or quinoa. You can even incorporate them into tacos or wraps for a boost of protein. Consider serving them with Sweet Potato Fries – the sweetness of the fries complements the coconut coating perfectly. To maximize convenience, prepare a larger batch and store them in individual portions for easy grab-and-go meals. For instance, you could package a few strips with a small container of Peppermint S’mores Jars for a decadent treat on the go. These versatile chicken strips are a testament to how simple and delicious healthy meal prep can be. Experiment with different serving sizes and storage methods to find what works best for your lifestyle. Don’t forget the added convenience of preparing them in bulk and storing them in individual containers, making them perfect for a quick and satisfying meal whenever you need it. They’re a smart addition to any meal prep strategy, providing a healthy and flavorful option for busy schedules. Coconut Chicken Strips – a fantastic, healthy choice for busy schedules!
Print Recipe & Pin Recipe
Want to whip up a delicious and surprisingly healthy weeknight meal? Baked Coconut Chicken Strips are just that – incredibly easy to make and packed with flavor. These aren’t your typical greasy chicken strips; they boast a wonderfully crispy exterior and a juicy interior, all thanks to the magic of baking. And best of all, they’re customizable to fit your dietary needs – gluten-free and low in fat, they’re a fantastic choice for anyone looking for a lighter, healthier option. Whether you’re prepping lunchboxes, enjoying a casual dinner, or simply craving a satisfying snack, these coconut chicken strips are a guaranteed hit. Let’s dive into the recipe and learn how to achieve that perfect balance of texture and taste.
Print Recipe Baked Coconut Chicken Strips
Pin Recipe Pin Recipe
Ingredients
- 3 Boneless, Skinless, Chicken Breasts
- 2 Eggs
- 1 1/2 cups Unsweetened Shredded Coconut
- 1/2 tsp Thyme
- 1/2 tsp Cumin
- 1/2 tsp each Salt & Pepper
Instructions
- Heat the oven to 400°F. Line a baking sheet with parchment paper.
- Slice the chicken breasts into 1/4-1/2″ thick strips. Cutting on a diagonal you can get about 6-8 strips per breast. Set aside in a bowl.
- In a shallow dish, wide enough for easy dipping, whisk the eggs with the salt and pepper.
- In a third dish, also good for dipping, combine the coconut, thyme and cumin.
- Using one hand as your “wet hand” and one as your “dry hand” dip the chicken strips one at a time. Dip first into the egg and fully coat. Shake off any excess dripping, then place the strip into the coconut. Switch hands, and coat fully in coconut. Transfer the strip to a baking sheet. Repeat until all your strips are coated.
- Make sure the strips are spaced out on the baking sheet. Overcrowding can lead to soggy chicken strips instead of crisp ones.
- Bake for 10 minutes, then flip the strips and bake for another 10 minutes or until golden brown and crisp.
These Baked Coconut Chicken Strips are a fantastic meal prep addition. You can easily double or triple the recipe and store them in the refrigerator for up to 4 days. Perfect for grab-and-go lunches or quick dinners. They also reheat beautifully in the oven – just pop them back in for 8-10 minutes to regain their crispy texture. Consider incorporating them into a larger meal; the recipe pairs perfectly with Sweet Potato Fries for a complete and balanced dinner. Don’t forget the delicious Peppermint S’mores Jars for a decadent treat—just be prepared to dress in layers! Experiment with different seasonings to customize the flavor profile – a pinch of paprika or garlic powder can add a new dimension. These baked strips are a simple, versatile, and undeniably tasty addition to your weekly menu. Enjoy!
 ,
, ,
, ,
, ,
, ,,
,,