Understanding the Secret to Staying-On Skin
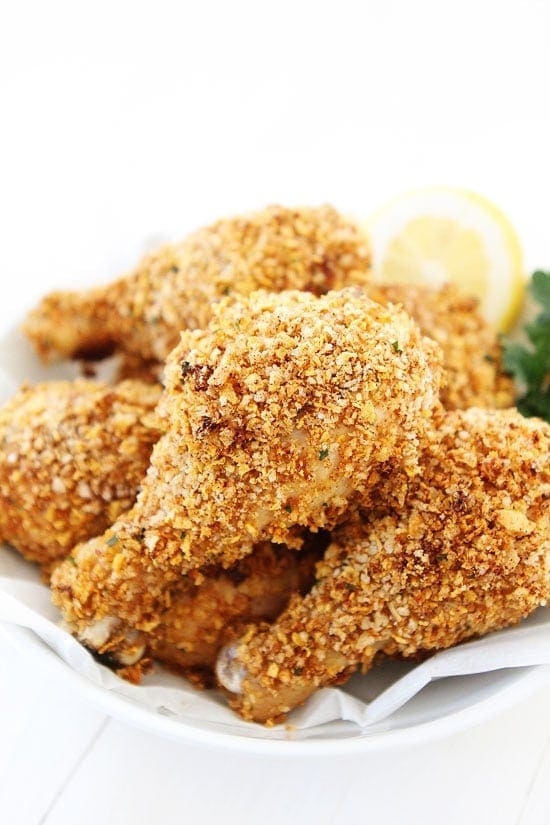
The persistent challenge of ensuring your oven-fried chicken’s skin remains beautifully adhered throughout the cooking process stems from a combination of factors, primarily involving moisture and heat. Traditional frying methods often result in the skin rapidly absorbing oil, creating steam that loosens the bond between the skin and the meat. However, by strategically manipulating these elements, we can achieve a consistently crisp and attached skin. The key lies in dehydration – both of the chicken and the flour coating.
Firstly, allowing the chicken to chill in the buttermilk bath for an extended period—ranging from a few hours to overnight—significantly reduces the moisture content of the meat. This pre-drying process is crucial. The longer the chicken soaks, the more water is drawn out, minimizing the steam produced during the subsequent frying or baking stages. Think of it as preparing the chicken for a sustained heat exposure without the disruptive effects of excessive moisture. This is where the term ‘buttermilk soak’ originates; the acidity in buttermilk further aids in breaking down proteins, which in turn, helps to draw moisture out of the chicken’s surface. dehydration
Secondly, the flour coating itself plays a vital role. A wet or insufficiently dry flour will inevitably contribute to steam formation. Therefore, we need to ensure a thoroughly dry coating. After the chicken has chilled in the buttermilk, immediately dredge it in the flour mixture. Don’t handle the chicken excessively, as this can reintroduce moisture. The drier the flour mixture, the more effectively it will create a crisp, textured coating that adheres firmly to the surface, without creating steam. Furthermore, using a ‘double dredge’ – dipping the chicken first in a slurry of cornstarch – can provide an additional layer of dryness, further mitigating steam production. cornstarch
Finally, the cooking temperature and duration are paramount. High heat initially encourages rapid skin drying, but excessive heat also increases steam production. Therefore, a moderate temperature, combined with careful monitoring, is essential. It’s better to cook the chicken slowly, allowing the skin to gradually dry out, than to blast it with high heat, which will simply generate steam and cause the skin to detach. Maintaining a consistent temperature throughout the cooking process is also vital. oven temperature
In essence, achieving that coveted ‘staying-on skin’ effect is a delicate balance – dehydration of the chicken, a thoroughly dry flour coating, and controlled heat application. By understanding and meticulously executing these principles, you’ll significantly increase your chances of delivering a beautifully crisp and flawlessly attached oven-fried chicken. crispness
Key Ingredients for Maximum Flavor and Crispness
Achieving truly exceptional oven-fried buttermilk chicken hinges on selecting and skillfully employing specific ingredients – each playing a crucial role in building both flavor complexity and that coveted, shatteringly crisp skin. Let’s delve into what makes the difference.
First and foremost, the quality of your buttermilk is paramount. Fresh, full-fat buttermilk provides the ideal acidity and fat content needed to tenderize the chicken and create a beautifully lacquered exterior. Don’t substitute with low-fat or skim milk; the difference in results will be immediately noticeable. Consider adding a splash of apple cider vinegar to further enhance the tang, amplifying the buttermilk’s ability to penetrate the chicken, resulting in juicy meat and a remarkably crisp crust. Using buttermilk with a slightly higher acidity level contributes to a superior outcome.
Next, let’s discuss the flour. While all-purpose flour works, incorporating a small amount of cornstarch dramatically increases the surface tension of the batter, which is critical for creating maximum crispness. Cornstarch forms tiny, microscopic air pockets as it heats, resulting in a lighter, airier, and significantly more shatteringly crisp coating. Aim for a ratio of approximately 2 parts all-purpose flour to 1 part cornstarch – this is a tried and true method for achieving the perfect texture. Avoid using bleached flour, as it can inhibit gluten development, leading to a tougher crust.
Furthermore, don’t underestimate the power of paprika – especially smoked paprika! The smokiness adds depth and complexity to the flavor profile, complementing the buttermilk beautifully. Using a combination of sweet and smoked paprika elevates the dish beyond a simple fried chicken. Knorr Bouillon powder (or a similar chicken bouillon cube) is also a valuable addition; it imparts a concentrated chicken flavor, intensifying the overall taste and adding richness. The strategic use of spices, such as garlic powder and onion powder, also contribute significantly to the layered flavor.
Finally, the inclusion of a small amount of white pepper is frequently overlooked. White pepper provides a subtle, delicate heat that doesn’t leave black specks on the chicken, maintaining a visually appealing finish. It’s a classic addition in many Southern fried chicken recipes, and its presence makes a noticeable difference. Experiment with different types of paprika (sweet, smoked, hot) to personalize the flavor to your preference. Don’t be afraid to adjust the ratios slightly – these guidelines provide a solid foundation, but ultimately, the best fried chicken is the one you enjoy the most, tailored to your own taste.
The Buttermilk Soak: The Foundation of Flavor
The secret to achieving that wonderfully crispy skin on your oven-fried buttermilk chicken lies, in no small part, with the buttermilk soak. It’s not just a step; it’s a transformative process that deeply penetrates the chicken’s surface, creating a moisture gradient essential for achieving maximum crispness. The buttermilk, rich in lactic acid, begins to gently break down the proteins in the chicken’s skin – specifically collagen. This process, known as denaturation, is crucial. It doesn’t just tenderize the chicken; it actually creates tiny pores within the skin. Protein denaturation allows the hot air from the oven to circulate freely around the chicken, accelerating the browning process and ultimately leading to that desirable golden-brown exterior. Understanding food science demonstrates the fundamental role of chemical reactions in cooking. Furthermore, the buttermilk’s acidity helps to inhibit the growth of bacteria, contributing to food safety while extending the chicken’s shelf life a little. The longer you soak the chicken in buttermilk – and the colder the buttermilk is, the better – the more pronounced the effects. A minimum of two hours is recommended, but 4-8 hours, or even overnight in the refrigerator, is ideal. During this time, the buttermilk subtly alters the chicken’s structure, preparing it for the subsequent flour coating. Many cooks believe that the magic truly happens when you add a pinch of baking soda to the buttermilk – roughly 1/2 teaspoon per quart. Baking soda’s role in baking further enhances the process by boosting the pH level, which aids in protein denaturation. The resulting chicken is exceptionally tender and receptive to the flour, creating a superior crust. Don’t simply toss the chicken in the buttermilk; gently submerge it, ensuring every surface is coated. The buttermilk should cover the chicken entirely. This isn’t just about taste; it’s about maximizing the oven-drying effect, ensuring even browning, and fundamentally preparing the chicken for the crispy texture you’re after. The science of oven-drying clarifies this critical step.
Preparing the Flour Coating: Achieving the Ideal Texture
Creating the perfect flour coating is absolutely crucial to achieving that coveted, shatteringly crisp texture for your oven-fried buttermilk chicken. It’s not just about throwing flour on the chicken; it’s about layering techniques and understanding how each step contributes to the final result. Let’s break down the process for optimal texture.
First, ensure your flour is fresh. Stale flour will absorb moisture and prevent proper crisping. Use a high-quality all-purpose flour – something with a good protein content is recommended, as it’s what helps create the gluten structure that contributes to the crunch. Ideally, sift the flour before using it. This aerates the flour, removing any lumps and allowing for a lighter, more even coating.
Next, incorporate your spices meticulously. The paprika, onion powder, garlic powder, cayenne pepper, and salt are key flavor components, but they also play a role in creating a textured crust. The cayenne adds heat, while the paprika provides color and depth. Don’t just add it all at once; it’s best to incorporate it gradually, tasting as you go, to ensure the seasoning is balanced and enhances, rather than overwhelms, the buttermilk flavor. A pinch of black pepper is also beneficial, adding a subtle warmth.
Now, let’s talk about technique. Instead of simply dumping the flour into a bowl, create a well in the center. This allows you to gradually add the buttermilk, preventing a soggy coating. Slowly pour in about two-thirds of the buttermilk, whisking constantly to form a thick, pasty slurry. This slurry acts as a glue, ensuring the flour adheres evenly to the chicken. The remaining buttermilk is reserved for the final dredge.
To dredge the chicken, work in batches to maintain optimal temperature. Place each piece of chicken in a large, resealable plastic bag – a Ziploc bag works perfectly. Seal the bag, removing as much air as possible. Add the seasoned flour mixture to the bag. Seal the bag again, shaking it vigorously to coat the chicken completely. Shake the chicken in the bag until it’s uniformly covered in flour – about 30-60 seconds per piece is typically sufficient. This motion is important; it’s not just about covering the chicken but also creating small ridges of flour that will caramelize beautifully during frying, developing that characteristic crispness. After the initial shake, remove the chicken from the bag and pat it dry with paper towels. This step is crucial. Excess moisture is the enemy of crispy skin! If you’re using a traditional dredging station, repeat the shaking process until the chicken is completely coated.
Allowing the chicken to rest for a brief period after dredging (around 15-20 minutes) is also beneficial. This allows the flour to hydrate fully and adhere even more strongly to the chicken’s surface. However, don’t let it sit for too long, or the flour will start to dry out and lose its ability to crisp effectively. Finally, before frying or baking, a light shake in extra flour, especially along the edges, will ensure a uniformly thick and textured crust. Understanding Gluten Development explains the role of gluten in achieving a crispy crust, offering further insight into the science behind this process.
Frying or Baking? Your Choice!
The beauty of this Buttermilk Chicken recipe lies in its adaptability – you truly have a choice between two fantastic methods of achieving that irresistibly crispy skin. Both frying and baking deliver exceptional results, but they offer slightly different textures and cooking experiences. Let’s explore each option in detail.
Frying – For Intense Crispness
Frying is arguably the quickest route to achieving maximum crispness. Submerging the coated chicken in hot oil creates a rapid Maillard reaction, the chemical process responsible for developing that deeply browned, intensely flavorful skin. It’s a more direct approach, delivering immediate gratification. You’ll want to use a heavy-bottomed skillet or Dutch oven to ensure even heat distribution and prevent scorching. Maintaining a consistent temperature – around 350-375°F (175-190°C) – is key. Don’t overcrowd the pan, as this will lower the oil temperature and result in soggy chicken. Turning the chicken frequently – every 5-7 minutes – ensures even browning and avoids sticking. A good rule of thumb is to fry until the internal temperature reaches 165°F (74°C) and the skin is a beautiful, deep golden brown. Keep a close eye on it – it can go from perfectly browned to burnt incredibly quickly.
Baking – For Gentle Perfection
Baking, on the other hand, provides a more gentle and even cooking process. While it might not achieve the exact same level of immediate crispness as frying, it still delivers incredibly delicious chicken. Baking utilizes dry heat, which creates a consistent, uniform crispness. It’s a fantastic method if you’re prioritizing even cooking and a tender interior. Preheat your oven to 375°F (190°C) and arrange the chicken pieces on a baking sheet – ideally a wire rack, which promotes airflow around the chicken for enhanced crispness. The rack helps the heat circulate around all sides of the chicken. Baking typically takes a bit longer than frying, usually around 45-60 minutes, depending on the size of the chicken pieces. To check for doneness, use a meat thermometer – the internal temperature should reach 165°F (74°C). The skin will be beautifully golden brown and crispy, though perhaps not as intensely deep-fried.
Hybrid Approach – The Best of Both Worlds
Many cooks swear by a hybrid approach: frying the chicken briefly to set the skin, then finishing it in the oven to achieve that perfect level of tenderness and crispness. This is a particularly good method if you’re aiming for maximum control over the cooking process. Temperature control is crucial when employing this strategy. More on cooking times can be found to help you determine the correct cooking times.
Ultimately, the choice between frying and baking is a matter of personal preference. Both are delicious methods, and experimenting to see which you enjoy most is highly encouraged. Exploring different cooking methods could provide additional inspiration!
Baking for Golden Perfection: A Detailed Process
Achieving that perfectly golden-brown, irresistibly crispy exterior on your oven-fried buttermilk chicken requires a nuanced approach. It’s more than just throwing it in the oven; careful temperature control and a strategic baking process are key. The goal is to create a dry surface on the chicken, which then interacts with the hot air, resulting in that delightful crunch. Let’s delve into the specifics.
Preheating is Crucial: Begin by preheating your oven to 375°F (190°C). Maintaining a consistent temperature is paramount. Use an oven thermometer to verify accuracy, as ovens can vary significantly. A stable temperature ensures even cooking and prevents the exterior from burning before the interior is fully cooked.
Placement Matters: Arrange the chicken pieces in a single layer in a large, rimmed baking sheet. Overcrowding will steam the chicken, compromising the crisping process. Ensure there’s ample space between each piece to allow air to circulate freely. Consider using a wire rack set inside the baking sheet; this elevates the chicken, further improving air circulation and promoting even browning. Even Heat Distribution is key to a successful bake.
Initial Baking Stage (15-20 Minutes): Place the prepared chicken on the baking sheet and bake for 15-20 minutes. This initial stage is designed to set the surface of the chicken, preparing it for the final crisping. You’ll notice the edges beginning to turn a light golden brown – this is a positive sign. Check the internal temperature of the chicken with an instant-read thermometer. The thickest part of the drumstick should reach 165°F (74°C) – this ensures it’s thoroughly cooked. Chicken Internal Temperature Guide provides a helpful reference.
Final Crispening Stage (10-15 Minutes): After the initial baking stage, increase the oven temperature to 400°F (204°C). Continue baking for another 10-15 minutes, or until the chicken is deeply golden brown and the internal temperature reaches 165°F (74°C). Keep a close eye on the chicken during this final stage, as it can burn quickly at higher temperatures. Rotating the baking sheet halfway through can help ensure even browning. Preventing Chicken from Burning offers valuable insights.
Resting is Essential: Once the chicken is cooked through, remove it from the oven and let it rest on the baking sheet for 5-10 minutes before serving. This allows the juices to redistribute, resulting in a more tender and flavorful chicken. Don’t skip this step! Why Resting Matters explains the importance of resting.
By meticulously following this detailed baking process, you’ll consistently achieve the perfectly crispy oven-fried buttermilk chicken you’ve been craving. Remember, patience and attention to detail are the hallmarks of culinary success.
Serving Suggestions: Elevating Your Buttermilk Chicken
To truly appreciate the remarkable texture and flavor of our perfectly crispy oven-fried buttermilk chicken, presentation and complementary accompaniments play a vital role. This isn’t just about eating chicken; it’s about crafting a memorable culinary experience. Let’s explore some ideas to elevate your meal to a whole new level.
Classic Pairings: Naturally, a simple serving of mashed potatoes is a timeless choice. The creamy, comforting texture of mashed potatoes provides a wonderful counterpoint to the crispy skin and juicy meat. Consider adding a dollop of unsalted butter and a sprinkle of fresh chives for an extra burst of flavor. Classic Sides offers a range of potato recipes to suit your taste.
Sweet and Savory Combinations: Buttermilk chicken pairs exceptionally well with sweet and tangy elements. A drizzle of honey, particularly a local wildflower honey, enhances the slight tanginess of the buttermilk and complements the golden-brown crust. Honey Drizzle Recipes shows how versatile honey can be. Alternatively, a fruit salsa – perhaps one featuring mango, pineapple, and red onion – provides a vibrant and refreshing contrast. Tropical Fruit Salsa is a fantastic option.
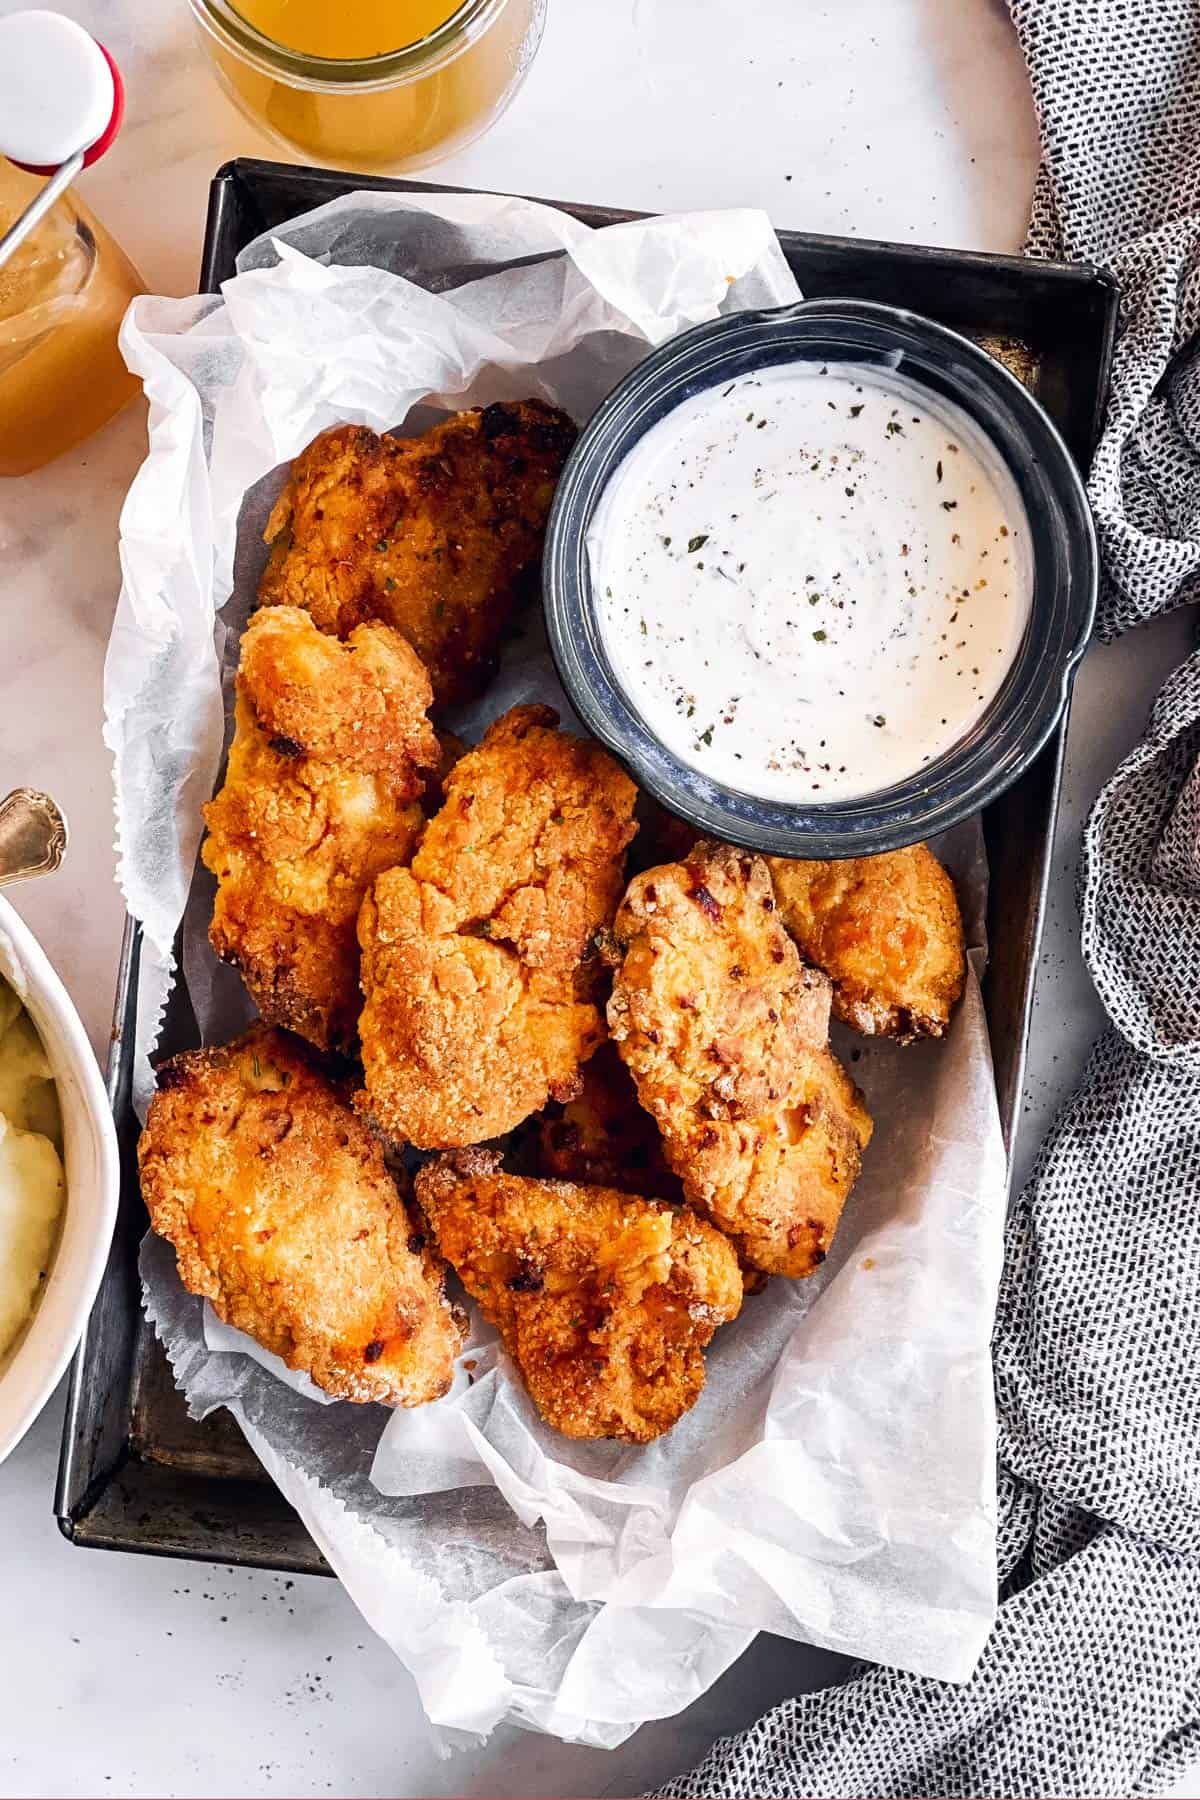
Sauces and Dipping Options: Don’t underestimate the power of a good sauce! A warm, reduced barbecue sauce adds a smoky depth that’s particularly delicious. BBQ Sauce Recipes offers a variety of styles to consider.
For a lighter option, a lemon-herb aioli – made with mayonnaise, lemon juice, garlic, and fresh herbs like dill and parsley – is incredibly refreshing and adds a bright, zesty flavor. Lemon Aioli Recipes is a great starting point. Even a simple ranch dressing provides a cool and creamy element that’s always a crowd-pleaser.
Garnishes for Visual Appeal: A sprinkle of chopped fresh herbs – parsley, chives, or cilantro – not only adds a pop of color but also intensifies the fresh flavor. A few lemon wedges are a welcome addition for an extra burst of citrus. Garnish Ideas provides inspiration for adding visual appeal to your meal.
Ultimately, the best serving suggestions for your oven-fried buttermilk chicken are those that you enjoy the most. Experiment with different flavors and textures to create a truly personalized and unforgettable culinary experience. Consider flavor pairing charts to explore further combinations.
Recipe Notes: Variations and Tips for Success
Achieving consistently crispy oven-fried buttermilk chicken is a rewarding culinary pursuit, and a few strategic adjustments can dramatically improve your results. Let’s delve into some key variations and tips to elevate your chicken game.
Temperature Matters: The success of this recipe hinges heavily on temperature control. Initially, frying the chicken at a lower temperature (around 350°F or 175°C) before increasing it to 400°F (200°C) towards the end promotes even cooking and crisping. This gradual temperature increase allows the exterior to develop a beautiful golden-brown crust without overcooking the interior. Experimenting with temperature variations based on your oven’s performance is highly recommended.
Don’t Overcrowd the Pan: Overcrowding the pan during the frying stage significantly lowers the temperature and leads to steamed, rather than crispy, chicken. Work in batches, ensuring there’s ample space around each piece to allow for proper air circulation. A Dutch oven or cast-iron skillet is ideal for maintaining consistent heat.
Adding Cornstarch to the Flour: For an even crispier exterior, consider incorporating 1-2 tablespoons of cornstarch into your flour mixture. Cornstarch is a powerful absorbent, helping to draw out moisture and create a delightfully crunchy crust. This is particularly beneficial if you’re aiming for a truly restaurant-quality result.
Spice It Up: While the recipe calls for paprika and cayenne pepper, don’t be afraid to experiment with other spices. Garlic powder, onion powder, smoked paprika, chili powder, or even a pinch of cumin can add depth and complexity to the flavor profile. Adjusting the spice levels is entirely up to your personal preference – adding a touch of smoked paprika can create a wonderfully savory crust. Flavor combinations can add exciting variation.
Resting the Chicken: After baking, allow the chicken to rest for 5-10 minutes before serving. This allows the juices to redistribute throughout the meat, resulting in a more tender and flavorful finished product. Resting meat is crucial for optimal results.
Double Frying (Advanced Technique): For an exceptionally crispy exterior, consider a double-frying technique. First, fry the chicken at 350°F (175°C) for 15-20 minutes. Then, increase the temperature to 400°F (200°C) and fry for an additional 5-10 minutes, until the skin is beautifully golden and incredibly crisp. Double frying techniques
Brining for Enhanced Moisture: Brining the chicken before coating it in the buttermilk mixture can significantly improve its moisture content. A simple brine consists of water, salt, and sugar, which helps to penetrate the meat and keep it juicy during cooking. Chicken brining recipes provides several ideas.
Quality of Ingredients: Ultimately, the quality of your ingredients matters. Using fresh buttermilk and high-quality spices will undoubtedly enhance the flavor and texture of your chicken. Buttermilk vs. cultured buttermilk
Remember, cooking is as much about experimentation as it is about following a recipe. Don’t be afraid to adjust the ingredients and techniques to suit your own taste and oven’s capabilities. With a little practice, you’ll be serving up perfectly crispy oven-fried buttermilk chicken in no time! Crispy fried chicken recipes offers inspiration.
 ,
, ,
,