Introduction: Why You’ll Love This Recipe
Let’s be honest, roasting a chicken can feel a little intimidating, right? The fear of uneven cooking, dry meat, and a whole lot of effort often keeps people sticking to simpler recipes. But what if I told you there’s a way to achieve consistently juicy, tender, and beautifully browned chicken – with minimal stress? This Roasted Butterflied Latin Style Chicken is that way. It’s not just a recipe; it’s a transformation. The key lies in the ‘butterflied’ technique, a simple but incredibly effective method that ensures the chicken cooks evenly from edge to edge. Instead of relying on traditional roasting, where the breast cooks much faster than the thighs, butterflying dramatically reduces cooking time and guarantees that your chicken is perfectly cooked throughout. Imagine enjoying succulent, flavorful meat with crispy skin – without the anxiety of carving a bird that’s either burnt on the outside or raw inside. This technique also enhances the flavor, allowing the spices to penetrate deeper into the meat. We’re talking about a richer, more complex taste that will elevate your weeknight dinners to something truly special. Furthermore, this method delivers a consistently beautiful presentation. The flattened shape allows for even browning and creates a visually stunning dish. It’s a fantastic option for entertaining or simply treating yourself to a delicious and impressive meal. Don’t let the name ‘butterflied’ scare you – it’s far simpler than it sounds, and the results are nothing short of extraordinary. It’s a technique that unlocks a new level of confidence in your cooking, allowing you to consistently deliver restaurant-quality results at home. This isn’t just about eating chicken; it’s about experiencing a more enjoyable and rewarding cooking process. Flavorful chicken preparation has never been easier!
The Butterflied Technique: Achieving Even Cooking
The key to this incredibly flavorful and visually stunning Roasted Butterflied Latin Style Chicken lies in the butterflied technique. It’s a seemingly simple modification that dramatically improves both the cooking time and the evenness of the roast. Traditionally, roasting a whole chicken can lead to one side being significantly darker and drier than the other, particularly if the heat isn’t perfectly consistent. This is because the thicker areas of the breast and thigh take considerably longer to cook, while the thinner areas are nearing done before the thicker sections catch up. The butterflied method tackles this head-on by effectively reducing the thickness of the breast and thigh meat. Reducing the thickness dramatically decreases the overall cooking time, minimizing the chances of overcooking the thinner portions while the thicker areas remain juicy and tender. It also allows for a more consistent heat distribution, which is crucial for creating a beautifully browned and evenly cooked bird. Understanding Heat Distribution in ovens can be tricky – this technique gives you a massive advantage.
Essentially, you’re creating a more uniform cooking environment. The process itself involves a few strategic cuts. First, you’ll want to cut along the backbone of the chicken, starting at the tail end and working your way up to the neck. This separates the backbone, making it easier to lay the chicken flat. See a visual guide here for a detailed explanation of this step. Then, using a sharp kitchen shear or poultry shears (a key piece of equipment for this process), you’ll carefully cut along either side of the backbone, essentially flattening the chicken breast and thigh. Don’t be afraid to apply a little pressure – a good, steady hand is important. This cuts the cooking time down significantly, creating a bird with perfectly uniform texture and colour. Researching the tools used in this process can improve your knowledge.
Furthermore, the flattened shape of the chicken promotes better heat conduction. The meat is closer to the heat source, resulting in faster and more efficient cooking. This isn’t just about speed; it’s about minimizing moisture loss, which is a major factor in dry chicken. By reducing the cooking time, you’re also reducing the likelihood of the exterior of the bird drying out before the interior is fully cooked. Consider the science of cooking to fully grasp this crucial concept. The butterflied technique truly elevates this simple roast to something extraordinary – consistently delicious and visually impressive. It’s a technique worth mastering for any home cook who appreciates perfectly cooked poultry.
Ingredients: Simple & Flavorful
Let’s talk about what you’ll need for this incredibly flavorful and satisfying Roasted Butterflied Latin Style Chicken. The beauty of this recipe lies in its simplicity – we’re using readily available ingredients that pack a serious punch of Latin-inspired taste. Don’t be intimidated by the ‘butterflied’ technique; it’s far easier than it sounds, and the payoff is a consistently juicy and tender chicken, perfectly roasted. The key is building layers of flavor, and we do this beautifully with a combination of dry and wet seasonings. Olive oil is the foundation, providing moisture and allowing the spices to adhere properly. We’re not just throwing in a few spices; we’re creating a complex blend that’s both savory and subtly sweet. You’ll find a generous helping of Goya chicken bullion – this is crucial for intensifying the chicken’s natural flavor. It’s a concentrated source of umami, something you’ll appreciate in every bite. Then, we have smoked paprika – a generous pinch adds a smoky depth that’s characteristic of many Latin American cuisines. Don’t underestimate the power of a good onion powder – it’s essential for building a foundational savory flavor. A teaspoon of sea salt (we recommend coarse sea salt for a bolder flavor) isn’t just for seasoning; it also helps to draw out moisture, further contributing to tenderness. And, of course, we’re incorporating dried rosemary for a herbaceous note that elevates the entire dish. Finally, a touch of black pepper provides a necessary sharpness and balances the richness. You’ll need approximately 1/2 teaspoon. Some cooks also add a clove of garlic (minced) for additional aroma and taste – feel free to experiment! The spices used contribute to a vibrant color and incredible taste that really represents Latin American food culture. Consider purchasing a Goya Adobo seasoning packet to take your flavor profile to the next level. The ratios are crucial to balancing flavors, so don’t be afraid to adjust based on your personal preference. The most important ingredient, however, is love (and a good roasting pan!).
Step-by-Step Instructions: Mastering the Roast
Let’s dive into the process of creating this incredible Roasted Butterflied Latin Style Chicken. It’s easier than you might think, and the results are truly exceptional. Follow these detailed instructions, and you’ll be enjoying a perfectly roasted chicken in no time.
1. Prep the Chicken: Begin by ensuring your chicken is fully thawed. This is crucial for even cooking. Pat the chicken dry with paper towels – this helps the skin crisp up beautifully. Remove any giblets from the cavity. You can find helpful videos on how to do this removing giblets – it’s a surprisingly satisfying task.
2. The Butterflied Technique – The Key to Even Cooking: This method is what sets this chicken apart. It reduces cooking time and guarantees a uniformly cooked bird. Place the chicken breast-side down on a cutting board. Using a sharp knife, carefully cut along the breastbone, working towards the backbone. You’ll be essentially slicing through the cartilage. Don’t be afraid to apply some pressure; it’s normal for the bone to resist. Continue cutting until you’ve separated the backbone. You can find a detailed guide on this technique butterflying a chicken – it may help visualize the process. The goal is to lay the chicken flat, essentially creating a more compact shape. This is extremely important for consistent cooking. It’s helpful to use a meat mallet for this step, tapping gently along the breastbone to further flatten it. This process will help your chicken cook faster and more evenly.
3. Seasoning for Flavor: Now it’s time to infuse your chicken with incredible Latin-inspired flavors. In a small bowl, combine the following: 1 teaspoon of Goya chicken bullion, 1 teaspoon of onion powder, 1 teaspoon of paprika, ½ teaspoon of sea salt, ¼ teaspoon of black pepper, and 1 teaspoon of dried rosemary. This blend will not only add incredible flavor but also help keep the chicken moist. Make sure this seasoning is evenly distributed throughout the chicken. You can use your hands to gently rub it into the meat, or if you prefer, a pastry brush.
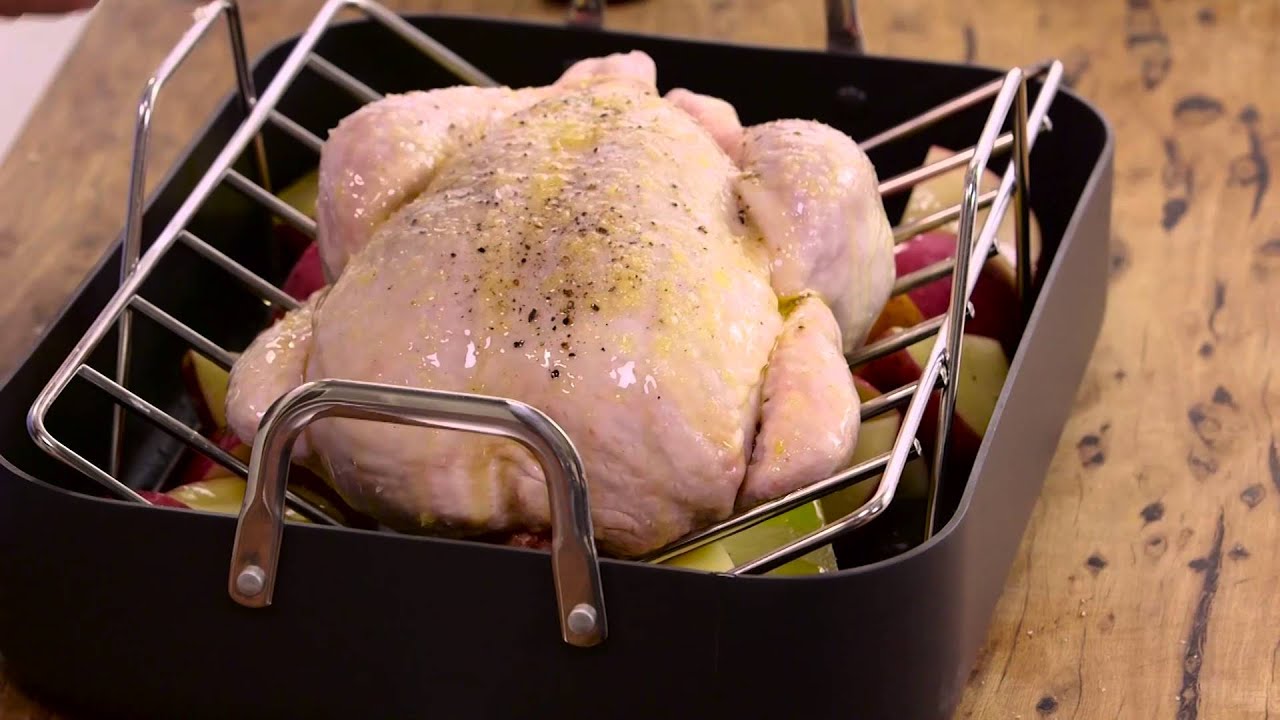
4. Roasting – Achieving Perfection: Preheat your oven to 500°F (260°C). This high heat is essential for a crispy skin and fast cooking. Place the chicken on a wire rack set inside a rimmed baking sheet. This allows air to circulate around the chicken, ensuring even cooking. Drizzle the chicken with 1 tablespoon of olive oil – don’t be shy; this will contribute to a beautifully browned skin. Roast for 15 minutes at 500°F (260°C). Watch carefully! If the skin starts to brown too quickly, reduce the oven temperature to 450°F (232°C). Continue roasting for a total of 45-50 minutes, or until a meat thermometer inserted into the thickest part of the thigh registers 175°F (79°C) – this is the most accurate way to gauge doneness. A helpful resource for understanding internal meat temperatures USDA temperature guidelines can guide you. Note: Roasting times may vary slightly depending on the size of your chicken.
5. Rest and Serve: Once the chicken reaches the target temperature, remove it from the oven and let it rest for 10-15 minutes before carving. This allows the juices to redistribute, resulting in a more tender and flavorful bird. Carve against the grain and serve with your favorite Latin sides – rice, beans, plantains, or a vibrant salsa are all excellent choices. To learn more about resting meat, you can find articles at Serious Eats.
Temperature Guide: Ensuring Perfectly Cooked Chicken
Achieving the perfect roast chicken hinges on understanding internal temperatures – it’s far more than just ‘done.’ Using a reliable instant-read thermometer is absolutely crucial, and knowing what those temperatures signify will elevate your dish significantly. Don’t rely solely on timing; a thermometer provides the most accurate indication of doneness. Temperature Guides offer valuable insights.
Here’s a breakdown of target temperatures, remembering that these are guidelines and slight variations are normal depending on your oven and the size of the chicken:
-
Breast Meat: The most critical area to monitor is the breast meat. Aim for an internal temperature of 165°F (74°C) for optimal tenderness and juiciness. Overcooking here leads to dry, tough breast meat. USDA Chicken Safety recommends this temperature for food safety as well. The breast will continue to rise slightly in temperature as it rests, so remove it from the oven when it’s within this range.
-
Thigh Meat: The thigh meat, being darker and richer in fat, can handle a slightly higher temperature. Ideally, you want the thickest part of the thigh – typically between the leg and the body – to reach 175°F (79°C). This ensures that the meat is thoroughly cooked and incredibly tender. Thigh Temperature notes that this is key for succulent results. The higher temperature also helps render more fat, enhancing the flavor.
-
Whole Bird Temperature: While not as important as monitoring the breast and thigh, the temperature of the thickest part of the breast (again, near the bone) should be around 160°F (71°C) before you start the resting period. This ensures that the entire bird is heated through. Whole Chicken Temperature Chart provide an excellent reference point.
-
Resting is Key: Once the internal temperature reaches the target ranges, remove the chicken from the oven and let it rest, loosely tented with foil, for at least 20-30 minutes before carving. This allows the juices to redistribute throughout the meat, resulting in a moister, more flavorful roast. Resting Chicken emphasizes the importance of this step.
Important Note: Don’t rely solely on visual cues like the appearance of the juices running clear. Thermometers are the most accurate way to guarantee a perfectly cooked roast chicken – a truly delicious and safe result. Thermometer Brands offer diverse options. Remember to calibrate your thermometer regularly to ensure accuracy.
Tips & Variations: Elevating Your Roast
To truly transform your Roasted Butterflied Latin Style Chicken from a fantastic recipe to a showstopper, let’s explore some fantastic variations and techniques. This method isn’t just about speed; it’s about maximizing flavor and achieving a consistently beautiful, juicy result.
Spice It Up! While the base recipe offers a wonderful foundation, don’t be afraid to personalize the spice blend. Adding a pinch of smoked paprika will introduce a subtle smoky depth, reminiscent of a wood-fired grill – a delicious complement to the Latin flavors. For a brighter, more vibrant profile, consider incorporating Mexican oregano instead of the standard oregano; its floral notes work beautifully with the chicken. A dash of chipotle powder adds a touch of heat, while a little cumin brings earthiness. Experiment with small amounts – you can always add more, but you can’t take it out!
Liquid Magic: Don’t just drizzle the oil; elevate the moisture! Adding a cup of chicken broth during the roasting process creates an incredible pan sauce. After the chicken is cooked through, deglaze the pan with the broth, scraping up all the browned bits from the bottom. Reduce the sauce slightly for a richer flavor. You can also incorporate white wine – a dry white wine adds brightness and complexity. Just be sure to reduce the wine completely before serving to eliminate excessive alcohol.
Root Vegetable Roasting: The beauty of this technique extends beyond the chicken. Alongside your chicken, roast a medley of root vegetables for a complete meal. Sweet potatoes, parsnips, and carrots all roast beautifully alongside the chicken, absorbing the delicious pan juices. Toss them with a little olive oil, herbs, and spices before adding them to the pan.
Herbaceous Finish: For a final flourish, sprinkle fresh herbs over the chicken during the last 10 minutes of roasting. Fresh rosemary and thyme are particularly wonderful choices. Also, consider adding some parsley for a vibrant burst of freshness. Don’t overcook the herbs – you want to preserve their bright flavors.
Resting is Key: Finally, remember to let the chicken rest for at least 15-20 minutes before carving. This allows the juices to redistribute throughout the meat, resulting in a juicier, more tender bird. Cover loosely with foil during this time.
Video Tutorial: A Visual Guide to Success
Let’s walk through this recipe step-by-step, visualizing the key techniques for a perfectly roasted Butterflied Latin Style Chicken. This video tutorial will build upon the written instructions, offering a dynamic understanding of each stage.
(Intro – 0:00-0:30)
First, let’s quickly review why this method is so effective. Butterflying the chicken – splitting it down the backbone and flattening it – dramatically reduces cooking time and ensures incredibly even cooking. The flat surface is exposed to the heat from all angles, eliminating those dreaded dry breast meat and undercooked thighs that can plague traditional roasting. You’ll need a sharp kitchen shear or a sturdy knife to achieve the best results. Kitchen Shears are recommended for a clean cut. Video demonstrating proper kitchen shear use.
(Preparing the Chicken – 0:30-1:30)
- Opening the Spine: This is often the trickiest part, but don’t be intimidated. Start by cutting down the center of the backbone with your kitchen shear or knife. Work slowly and deliberately. Detailed knife skills tutorial can be helpful for those new to this technique. You can use a mallet to help with this step too Mallet for tenderizing.
- Flattening the Chicken: Now, lay the chicken breast-side down and gently press down on the breast bone with a mallet or the flat side of a heavy pan. This step is crucial for creating that even cooking surface. Aim for a flatten, don’t smash. You’ll feel a slight give as you apply pressure. How to flatten a chicken breast.
(Seasoning & Roasting – 1:30-3:00)
- Applying the Spices: Once flattened, place the chicken skin-side up on a wire rack set over a baking sheet. Drizzle generously with olive oil – about 2 tablespoons – followed by the chicken bullion (about 4 oz) – this adds incredible depth of flavor. Then, add 1 tablespoon of paprika, 1 teaspoon of onion powder, 1 teaspoon of sea salt, 1/2 teaspoon of black pepper, and 1 teaspoon of dried rosemary. Ensure every part of the chicken is coated. Using your hands, massage the spices into the chicken, making sure it’s evenly distributed. The spices work to create a beautiful sear and enhance the overall flavor.
- Roasting Time: Preheat your oven to 500°F (260°C). Roast for 45 minutes, then reduce the heat to 450°F (232°C) and continue roasting for another 30-45 minutes, or until the internal temperature reaches 150°F (66°C) in the thickest part of the thigh and 175°F (79°C) in the breast. Use an instant-read thermometer to check the temperature accurately. Instant Read Thermometer.
(Temperature Guide – 3:00-3:30)
Here’s a quick temperature guide to ensure perfectly cooked chicken:
- Breast: 150°F (66°C) – This will yield juicy, tender breast meat.
- Thigh: 175°F (79°C) – Ensures the thigh is cooked through without being dry.
(Final Thoughts – 3:30-4:00)
Don’t rush the process. Slow roasting at higher temperatures and monitoring the internal temperature are key to achieving this exceptional result. With a little practice, you’ll master the Butterflied Latin Style Chicken and impress your family and friends! Recipe for Chicken Broth. Remember to use this broth to make the Chicken Broth to take this flavour to the next level.
 ,
, ,
, ,
, ,
, ,
, ,
,