
The Secret to Ultra-Crispy Chicken
Let’s be honest, achieving truly exceptional fried chicken – that shatteringly crisp exterior, revealing succulent, juicy meat within – is a culinary aspiration for many. It’s a pursuit that often ends in disappointment, with soggy skin and unevenly cooked interiors. But fear not, because unlocking this coveted level of fried chicken perfection hinges on a few key strategic steps. It’s not just about throwing chicken in hot oil; it’s about creating a controlled environment that prioritizes moisture retention and encourages maximum surface area browning.
Firstly, the brine is paramount. The classic buttermilk brine, while perhaps not technically a ‘brine’ in the traditional sense, is a vital ingredient. Buttermilk’s acidity gently breaks down the proteins in the chicken, a process called denaturation. This, in turn, helps to keep the meat incredibly moist during the cooking process. Think of it like creating a protective shield that prevents the muscle fibers from drying out, a common culprit of dry, lackluster fried chicken. A longer brining time (at least 4 hours, ideally overnight) will give the buttermilk more time to work its magic, further tenderizing the chicken and ensuring a significantly juicier result. Don’t be tempted to skimp on the brine – it’s the foundation of a perfectly cooked piece of fried chicken. To that end, don’t throw in any vinegar or lemon juice as this will overly affect the protein and cause the chicken to become tough as old grandpa’s boot!
Beyond the brining process, the way you handle the chicken during the dredging stage is equally crucial. Gently pat the chicken dry with paper towels after the brining process. Excess moisture is the enemy of crisping. A quick shake removes any remaining surface water. Then, use a light hand when coating the chicken with the panko breadcrumbs. Over-coating creates a thick layer that doesn’t adequately brown and can lead to uneven cooking. The goal is a delicate, even layer that will provide a fantastic base for achieving that characteristic golden-brown color.
Furthermore, maintaining the correct oil temperature is absolutely critical. The oil should be hot enough (around 325-350°F or 163-177°C) to rapidly cook the exterior without allowing the interior to become overcooked. Monitor the temperature with a thermometer to ensure accuracy. Don’t overcrowd the pan – cooking too many pieces of chicken at once will dramatically lower the oil temperature, resulting in steamed rather than fried chicken. Cook in batches to maintain the ideal temperature and ensure even browning. Finally, don’t be afraid to let the chicken rest for a few minutes after removing it from the pan. This allows the juices to redistribute, further contributing to a juicier, more tender result. A brief period of rest is the final piece of the puzzle in achieving truly exceptional fried chicken – it’s a technique utilized by professional chefs around the world rest-time!
To recap, the key elements are a lengthy brining process, a light panko coating, maintaining a consistent oil temperature, and avoiding overcrowding the pan. Follow these steps, and you’ll be well on your way to consistently producing fried chicken that is both unbelievably crispy and incredibly juicy. It’s an investment of time and attention, but the payoff – a truly unforgettable fried chicken experience – is well worth it best-fried-chicken
Miso Magic: Unlocking the Flavor
Let’s dive into what makes miso fried chicken truly exceptional. Miso, a fermented soybean paste, isn’t just a seasoning; it’s a complex flavor bomb. Traditionally, miso is known for its savory, umami notes, but when combined with the textural richness of deep-fried chicken, it creates a sensory experience unlike any other. Umami is the key – it’s a fifth basic taste (along with sweet, sour, salty, and bitter) that enhances the savory richness of the dish. The fermentation process creates glutamates, naturally occurring amino acids that trigger the umami receptors in our mouths. Different types of miso – light, dark, white, red – will impart slightly different nuances. White miso is generally milder and sweeter, ideal for balancing the savory intensity, while darker misos, like red miso, offer a more robust, intense flavor. Incorporating miso into the brining solution or the breading process allows the chicken to absorb this complex flavor at a molecular level, ensuring a deeper, more satisfying taste. Miso Flavors offers a deep dive into the varieties and their characteristics. Furthermore, the slight saltiness of miso is fantastic at tenderizing the chicken, contributing to its incredible juiciness. Don’t be intimidated by miso; it’s a fundamental ingredient in Japanese cuisine and a cornerstone of this dish. How to use miso provides useful tips to incorporate miso into your own cooking.
Consider experimenting with ratios – a little goes a long way. Starting with a tablespoon of white miso in your brine, or adding a teaspoon to your breadcrumb mixture, is often sufficient. You can always adjust to your taste. The beauty of this recipe lies in its adaptability. Ultimately, you’re transforming simple chicken into something truly extraordinary, leveraging the transformative power of fermentation to achieve a flavor profile that is both deeply satisfying and incredibly memorable. Miso Varieties can further help you explore the different flavor dimensions.
Building the Perfect Miso Aioli
Let’s be honest, a truly outstanding miso fried chicken experience hinges significantly on the quality of the sauce drizzled over it. Forget the basic mayonnaise – we’re crafting a miso aioli, a creamy, intensely flavorful companion that elevates this dish to a whole new level. This isn’t just about adding moisture; it’s about layering umami, tang, and subtle sweetness for a flavor explosion with every bite. Miso paste is the heart of this sauce, bringing that signature fermented complexity. The process itself is incredibly simple, requiring just a handful of ingredients and minimal effort. The key is to build the flavors slowly, allowing the miso to fully integrate and bloom. Don’t rush this step – let it sit for a few minutes to fully infuse into the aioli.
First, we start with the base: egg yolk. Egg yolks provide richness and stability to the aioli, creating a luxurious texture. Adding a bit of cold water helps to temper the yolk, preventing it from scrambling. Next, comes the miso – traditionally, a white miso is selected for its mild saltiness and umami profile, but feel free to experiment with a red miso for a bolder, more intense flavor. White miso paste offers a balanced flavor. A small clove of garlic, crushed, adds a subtle pungent note and aromatics – Garlic is a powerhouse of flavor! A splash of rice vinegar provides a crucial tangy counterpoint to the richness of the miso and egg, cutting through the fattiness and brightening the overall taste. Rice Vinegar adds a wonderful brightness. Finally, a touch of cold water adjusts the consistency, creating a smooth, spreadable aioli. Don’t add too much though – start with a tablespoon and add more slowly until you achieve the desired texture. A small drizzle of maple syrup— Maple Syrup — adds a subtle sweetness that balances the savory elements. Taste and adjust – more maple syrup for sweetness, more rice vinegar for tang, or even a pinch of freshly ground black pepper for a bit of warmth. The beauty of this aioli is its adaptability. You can experiment with different types of miso, add a dash of chili flakes for heat, or incorporate herbs like chives or scallions. This aioli isn’t just a condiment; it’s the secret weapon that transforms your miso fried chicken from good to extraordinary. Properly stored in the fridge, this aioli will keep for around 5-7 days. Always ensure you’ve used a clean utensil when scooping the aioli to avoid contamination. Food Safety is important when making sauces and dressings. Remember to properly chill the aioli before serving. A well-made miso aioli is the cornerstone of a truly exceptional miso fried chicken experience. Don’t be afraid to play around with the proportions until you find the perfect balance for your palate.
Char Siu Sauce: A Sweet & Savory Kick
Let’s be honest, a perfectly cooked miso fried chicken deserves a sauce that really elevates the experience. And that’s where our Char Siu Sauce comes in – a deliciously complex blend of sweet, savory, and subtly smoky flavors. This isn’t your typical ketchup-based glaze; it’s a deeply satisfying accompaniment that cuts through the richness of the chicken while amplifying the umami notes. Sweet & Savory Flavors are what this sauce is all about!
Traditionally, Char Siu (Chinese BBQ Pork) uses a marinade consisting of honey, hoisin sauce, soy sauce, five-spice powder, and Shaoxing wine. We’ve taken that classic foundation and tweaked it for ultimate fried chicken compatibility. We’ve added elements like mirin (a sweet Japanese rice wine) to enhance the glaze, kecap manis (a rich, sweet Indonesian molasses-based sauce) to deepen the flavor, and a touch of ginger to offer a bright, zesty counterpoint. Understanding Kecap Manis is key to mastering this sauce, but don’t worry – we’ll break it down for you.
The Recipe:
- 2 tablespoons hoisin Hoisin Sauce – this provides the foundational savory base.
- 1 teaspoon five-spice powder – adds the signature fragrant warmth. Five Spice Powder Explained
- 1 tablespoon mirin – for sweetness and glaze.
- 1 teaspoon ginger, grated – a bright, fresh kick.
- 1 tablespoon kecap manis – deepens the flavor profile to enhance the richness
- 1 clove garlic, crushed – a fundamental element for layering flavor.
- 1 tablespoon honey – for adding a touch of sweetness, balances the saltiness
- 1 tablespoon soy sauce – for saltiness and umami
Instructions:
Simply whisk all ingredients together in a small bowl until well combined. Taste and adjust as needed – you might want a touch more honey for extra sweetness or a pinch of five-spice powder for a more intense flavor. This sauce is fantastic served immediately over the finished miso fried chicken. However, it also benefits from sitting for 30 minutes before serving, allowing the flavors to fully meld. You can keep this in the fridge for 5 days.
Serving Suggestions:
Don’t just drizzle this sauce on your chicken – get creative! A little bit on the burger bun, a little over the crispy fried chicken, this sauce is perfect. Creative Ways to Use Char Siu Sauce are endless.
Tools You’ll Need:
- Small mixing bowl
- Whisk
Related Resources:
Plating & Assembly: The Final Touch
Okay, folks, we’ve got a seriously incredible miso fried chicken here, and now it’s time to build the ultimate experience. Plating isn’t just about presentation; it’s about maximizing that textural and flavor explosion with every single bite. Let’s get into it.
First, let’s talk about the buns. Toasting them lightly – seriously, don’t skip this – brings out a wonderful sweetness and adds a welcome crunch. You want them golden brown and slightly crisp, not burnt. Spread a generous layer of the chilled miso aioli – sweet & savory aioli – across both halves. This isn’t just a condiment; it’s a crucial component, amplifying the umami of the chicken. Don’t be shy! You want a good, thick layer for maximum flavour impact. Spread the miso aioli and top with a generous amount of lettuce for a crisp, refreshing element that cuts through the richness of the chicken and aioli. Using a crunchy lettuce is a really key element to consider.
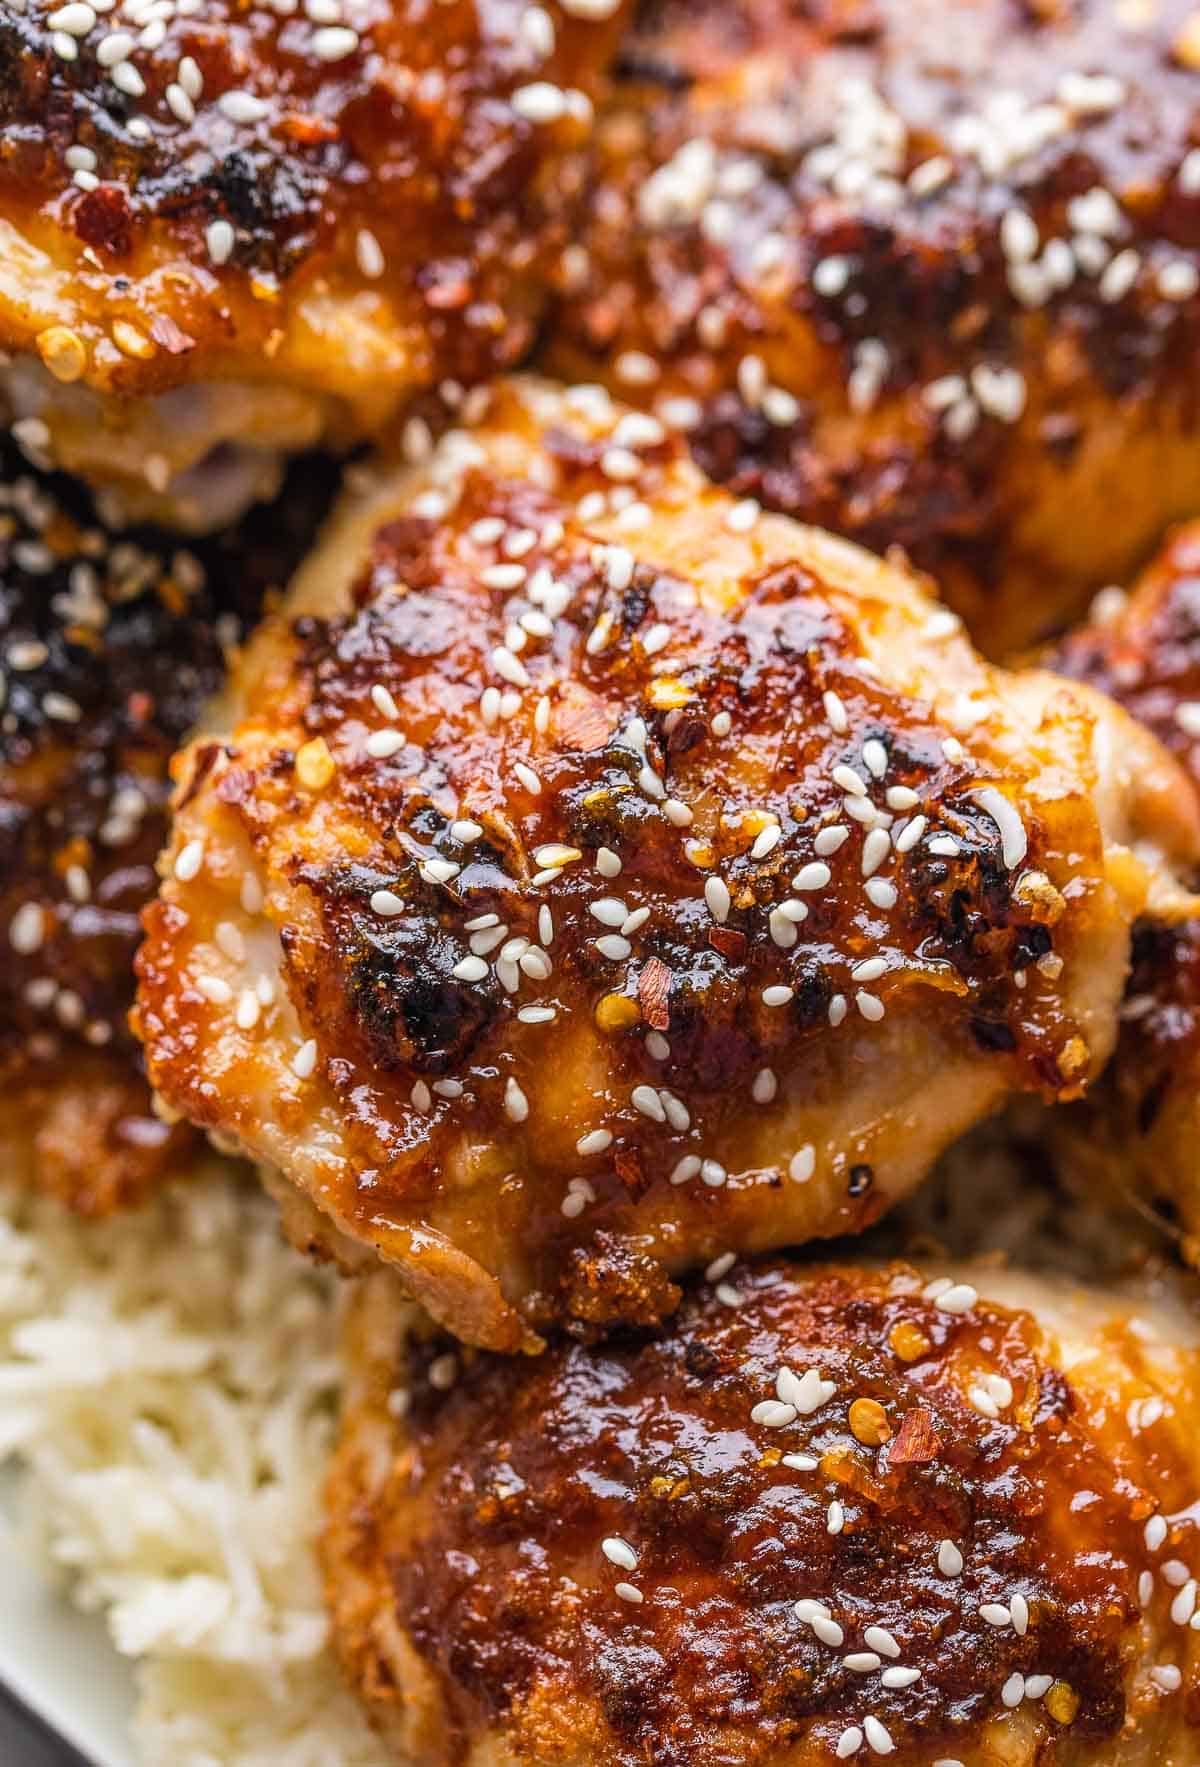
Now for the star of the show: the miso fried chicken. Carefully place one or two, depending on how hungry you are, thighs of crispy fried chicken onto the prepared bun. Don’t just plop them down; arrange them slightly, creating a visually appealing stack. This is where you can really lean into the moment – it’s about enjoying the incredible food you’ve created. Drizzle liberally with the Char Siu sauce – sweet & savory char siu sauce – allowing it to cascade down the sides of the chicken. This sauce adds a fantastic level of flavour complexity. This adds a burst of intense umami to the dish, elevating it to a completely new level. This sauce really brings out the flavour profile, really a key component of the dish creating the ultimate fried chicken. A really key aspect of building this dish.
Finally, the finishing touches. A sprinkle of toasted sesame seeds – sesame seeds – adds a beautiful visual element and a subtle nutty flavour. A few extra pickled sushi ginger slices – sushi ginger – are essential. The tangy, slightly sweet ginger cuts through the richness and provides a vital counterpoint. Close it all up with the top bun, pressing gently to secure. Serve immediately to prevent the bun from getting soggy. Presenting the dish properly is paramount to the success of this dish, you have put a lot of work into creating this delicious meal! And you have put the effort into creating the perfect presentation for your first bite.
Don’t be afraid to get creative! Experiment with different toppings and garnishes to find your perfect combination. But honestly, even with all these additions, the core of this dish – that incredibly crispy, deeply flavourful miso fried chicken – is already incredible.
Essential Tools for Success
Let’s be honest, achieving that perfect, shatteringly crisp, umami-rich miso fried chicken isn’t just about the ingredients – it’s about having the right tools to help you execute the process flawlessly. Investing in a few key pieces of equipment will dramatically elevate your cooking experience and ensure consistent, restaurant-quality results. Don’t skimp here; it’s an investment in deliciousness!
1. Heavy-Bottomed Frying Pan (Cast Iron Recommended): This is arguably the most crucial tool. A heavy-bottomed pan, particularly one made of cast iron, is absolutely vital. Cast iron retains heat incredibly well, which is essential for maintaining a consistent oil temperature throughout the frying process. This prevents hot spots, ensuring your chicken cooks evenly and achieves that coveted crispy exterior. A lighter pan will struggle to maintain the necessary heat, leading to uneven cooking and potentially soggy chicken. A 12-inch cast iron skillet is a fantastic investment – cast iron cookware are especially popular! Read reviews to get an idea of a suitable skillet. Alternatively, a carbon steel pan is a lighter, more responsive option.
2. Thermometer (Digital Instant-Read): Monitoring the oil temperature is absolutely critical. You want to maintain a steady 170°C (340°F) – anything lower and your chicken will steam instead of fry, resulting in a lackluster crust. An instant-read digital thermometer (thermometer) is a game-changer. It allows you to accurately gauge the temperature without constantly dipping a thermometer into the hot oil. Learn more about cooking temperatures – precise control is key!
3. Slotted Spoon or Spider: When removing the chicken from the hot oil, you’ll need a tool to gently lift it out without disturbing the crispy coating. A slotted spoon or a spider strainer (spider strainer) is ideal. Avoid using tongs, as they can easily disrupt the delicate coating.
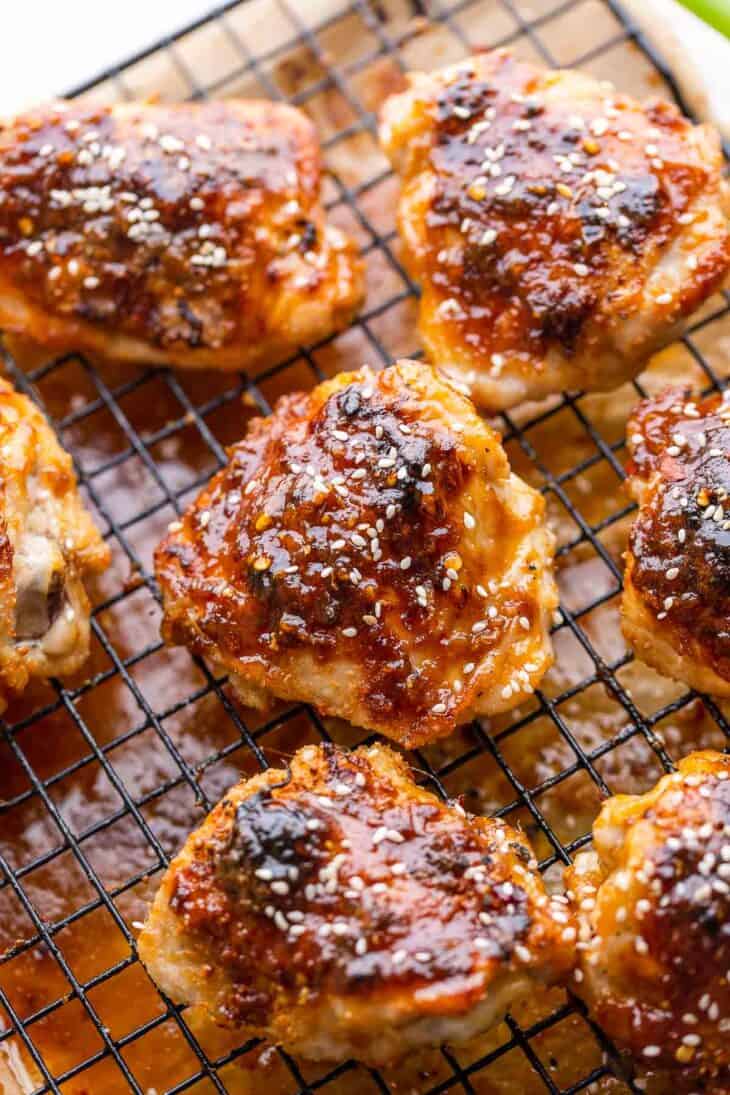
4. Wire Rack (for Cooling): Once the chicken is cooked, you’ll need a way to drain off excess oil. A wire rack (wire rack) placed on top of a baking sheet is perfect. This allows air to circulate around the chicken, keeping it crisp. Don’t place the chicken directly on a baking sheet, or it will steam and lose its crunch. Check out these options.
5. Measuring Cups and Spoons: Accuracy in measuring ingredients is crucial, especially when it comes to the miso aioli and char siu sauce. Precise measurements ensure a balanced flavor profile. Get a set of measuring cups and spoons.
6. Food Processor: A food processor (food processor) is recommended for making the miso aioli and char siu sauce – they benefit from a smooth and emulsified texture.
7. Apron & Heat-Resistant Gloves: Safety first! An apron will protect your clothing from splatters, and heat-resistant gloves (heat-resistant gloves) will shield your hands from the hot oil. It’s better to be safe than burned!
Tips & Tricks for Miso Fried Chicken Perfection
Okay, let’s talk about elevating your Miso Fried Chicken from ‘good’ to ‘mind-blowingly delicious’ – because frankly, it deserves that upgrade! There are a few key techniques that can dramatically impact the texture and flavor. Don’t just throw some chicken in a pan and hope for the best; precision is your friend.
1. The Pan is Paramount: Use a heavy-based frying pan – cast iron is ideal, but a sturdy carbon steel pan will also work wonders. A lighter pan will struggle to maintain the necessary heat, leading to uneven cooking and a soggy result. Make sure your pan is completely dry before adding the oil – even a small amount of water will cause the oil to splatter violently.
2. Oil Temperature Control – The Holy Grail: Maintaining a consistent oil temperature is critical. Aim for around 175°C (350°F). If the oil is too cool, the chicken will steam instead of frying, resulting in a pale, limp mess. If it’s too hot, the outside will burn before the inside is cooked through. Invest in a good thermometer – it’s the single most valuable tool in your kitchen when making fried chicken! You can monitor the temperature and adjust the heat accordingly, adding more oil as needed. Don’t overcrowd the pan – cook in batches to ensure the oil temperature doesn’t drop too much. It’s better to cook a little slower and get perfectly crispy chicken than to burn the first batch and then try to salvage the second.
3. The Double Dredge – Texture Transformation: Don’t skimp on the breading! The double dredge (panko, then breadcrumbs) is key to achieving that incredibly crispy exterior. Make sure each piece of chicken is completely coated, pressing the breadcrumbs firmly into the surface. A little bit of cornstarch mixed into the breadcrumbs can also help create an even crispier crust. This step isn’t just about appearance; it’s about building layers of texture that will shatter in your mouth with every bite. It’s best to let the chicken rest in the breadcrumbs for at least 15 minutes before frying to allow the coating to adhere properly.
4. Don’t Overcook – Internal Temperature Matters: Use a meat thermometer! Internal temperature is the true indicator of doneness. Chicken thighs should reach 74°C (165°F) for optimal safety and tenderness. Overcooked chicken will be dry and tough. The pan will likely cook the chicken faster than the thermometer suggests, so keep an eye on it and remove it from the heat when it reaches the target temperature. Resting the chicken after cooking (for at least 5-10 minutes) allows the juices to redistribute, resulting in a more tender and flavorful bird. Resting Techniques is super important for tenderness!
5. Miso Magic – Don’t Overmix: When making the miso aioli and char siu sauce, be gentle! Overmixing can activate too much of the enzyme that breaks down the oil, leading to a thinner, less emulsified sauce. Stir just until combined. A little bit of patience will yield a far superior result. Miso Pairing Guide is super helpful for flavour combinations.
6. Strategic Resting: Resting the chicken after frying is just as important as resting it before. This allows the residual heat to finish cooking the interior, while the crust retains its crispness. Cover loosely with foil to keep it warm. Chicken Resting Techniques truly helps prevent that drier, less delicious texture.
7. Breadcrumb Variations: Experiment with different breadcrumb types! Panko gives the classic crispy texture, but adding a small amount of finely ground rice flour to the breadcrumb mixture can enhance the crispness even further. Rice Flour Benefits will help you get the most out of your rice flour.
8. Temperature Shock Avoidance: Don’t plunge the hot fried chicken directly into a cold bowl of water – this can cause the crust to steam and lose its crispness. Serve immediately to enjoy the full textural impact. Crispness Preservation is crucial!
Nutritional Breakdown: Calories & Macros
Let’s dive into the nutritional details of this incredible Miso Fried Chicken – it’s not just delicious, it’s surprisingly well-balanced! A single thigh (approximately 150g/5.3oz) provides a substantial amount of protein and healthy fats, making it a satisfying and nourishing meal. However, due to the use of coconut milk, breadcrumbs, and a touch of maple syrup, it’s important to be mindful of the calorie content. Calories per thigh roughly averages around 340kcal, though this can vary slightly depending on portion sizes and specific ingredients used. This is significantly influenced by the amount of coconut milk utilized – a little adds flavour but substantially increases the calorie count. The panko breadcrumbs contribute around 150kcal – a testament to their delicious crispness. Panko Breadcrumb Nutrition The protein content is substantial, clocking in at approximately 25-30g per thigh, thanks to the chicken itself and the panko. Chicken Nutrition This makes it a fantastic source of amino acids, essential for muscle repair and growth. Furthermore, the use of coconut milk adds beneficial fats – primarily medium-chain triglycerides (MCTs), which are rapidly metabolized and can provide sustained energy. Coconut Milk Nutrition The other significant nutrient contributors are carbohydrates, primarily from the breadcrumbs and maple syrup. Approximately 20-25g of carbs are present, with a good portion being complex carbohydrates rather than simple sugars. The fat content, excluding the coconut milk, is relatively low, around 8-12g, primarily from the chicken fat and the small amount of oil used in frying. It’s worth noting the sodium content is higher due to the use of miso, oyster sauce, and soy sauce – so moderation is key, especially for those watching their sodium intake. A typical serving (two thighs) contains roughly 700mg – 800mg of sodium. Sodium in Soy Sauce Here’s a more detailed breakdown per thigh (approximate values):
- Calories: 340kcal
- Protein: 28g
- Fat: 12g (8g Saturated, 4g Unsaturated)
- Carbohydrates: 22g (12g Sugars)
- Fiber: 3g
- Sodium: 650mg
- Potassium: 350mg
Please note: These figures are estimations and may vary slightly depending on precise ingredient quantities and preparation methods. For highly accurate tracking, consider using a nutrition tracking app, MyFitnessPal or similar. It’s truly a balanced meal, delivering both flavour and essential nutrients. Enjoy responsibly and savor the umami explosion! Coconut Oil Nutrition
 ,
, ,
, ,
, ,
, ,
, ,
, ,
,