Introduction: The Magic of Shake & Bake Chicken
Shake & bake chicken – it sounds almost too good to be true, doesn’t it? The ability to achieve unbelievably crispy, golden-brown chicken with minimal effort is a culinary dream. And the beautiful thing about this technique isn’t some complicated, hours-long process; it’s a remarkably quick and simple method that delivers consistently fantastic results. At its core, shake & bake relies on a clever combination of dry ingredients – typically a blend of seasoned breadcrumbs, flour, and spices – that create a scorching hot crust when baked, resulting in that shatteringly crisp exterior. The dry coating acts like a miniature convection oven, rapidly dehydrating the surface of the chicken and creating a fantastic Maillard reaction, responsible for much of that delicious flavor and browning. It’s a method rooted in old-fashioned preservation techniques, cleverly adapted for modern kitchens. The appeal lies in its remarkable simplicity: you just coat the chicken, bake it briefly, and voila! Perfectly crispy chicken, ready to be enjoyed. It’s a testament to the power of strategic heat and a touch of clever ingredient combination. Don’t be intimidated by the ‘magic’ – it’s simply science, perfectly executed. Beyond the incredible texture, the flavor is also surprisingly robust, thanks to the spices and seasonings incorporated into the coating. Whether you’re a seasoned cook or just starting your culinary journey, shake & bake chicken is a fantastic recipe to master. It’s a guaranteed crowd-pleaser and a fantastic way to elevate your weeknight meals. Crispy Chicken Recipes or Chicken Cooking Tips can provide even further guidance. And for those looking to customize their own flavor profiles, experimenting with different spice blends is highly encouraged – think Cajun seasoning, Italian herbs, or even a smoky chipotle powder. Spice Blends for Chicken offers some great starting points. The key to success is really understanding the process – focusing on that high-heat dry coating, and baking it quickly. Don’t overbake it; you’re aiming for a dry surface, not a completely cooked-through piece of meat. Understanding Maillard Reaction gives a deeper insight into what’s happening during the baking process. With a little practice, you’ll be whipping up perfect shake & bake chicken in no time – a true testament to the beauty of simple cooking. Easy Chicken Recipes provides a range of tasty options.
Ingredients: What You’ll Need for Deliciousness
Let’s gather everything you’ll need to create this unbelievably crispy and flavorful shake & bake chicken – it’s surprisingly simple, yet the results are exceptional! Here’s a detailed breakdown of the ingredients, ensuring you have everything in place for a truly satisfying meal.
For the Chicken:
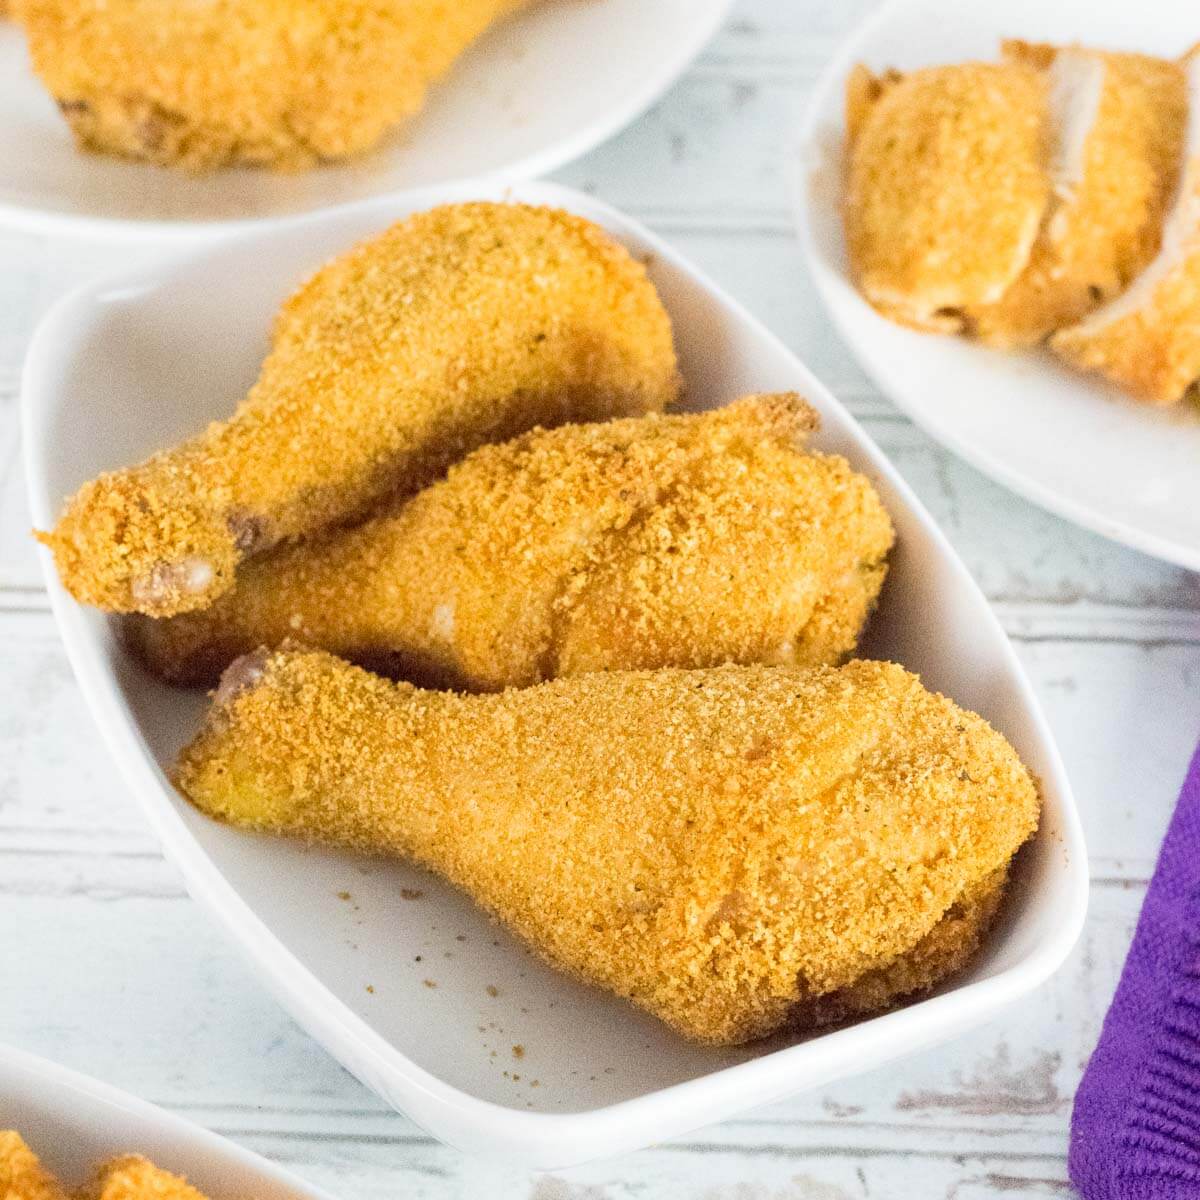
- Chicken Pieces: Approximately 1.5 – 2 pounds of bone-in, skin-on chicken pieces. Thighs and drumsticks are particularly well-suited for this method, as they tend to stay moist and develop a fantastic crust, but breasts can be used as well – just be mindful of cooking time to prevent overcooking.
- Salt: Approximately 1.5 – 2 teaspoons of fine sea salt. Salt is absolutely crucial for both flavor and helping the coating adhere properly. Don’t be shy! Seasoning generously now will make a huge difference.
- Black Pepper: 1-2 teaspoons of freshly cracked black pepper. Freshly cracked pepper provides a much more intense flavor than pre-ground.
- Garlic Powder: 1 teaspoon. Garlic powder adds a subtle, savory depth.
- Paprika: 1 teaspoon (Smoked paprika adds a particularly delicious smoky note, but sweet paprika works well too).
- Onion Powder: 1/2 teaspoon. Onion powder contributes a subtle onion flavor that complements the other spices.
For the Coating:
- All-Purpose Flour: 1 cup (This provides the base for the coating and helps it stick to the chicken).
- Cornstarch: 1/2 cup. Cornstarch contributes to the incredible crispness of the coating.
- Baking Powder: 2 teaspoons. Baking powder helps create a lighter, airier coating.
- Cayenne Pepper: 1/2 – 1 teaspoon (optional, for a touch of heat – adjust to your preference).
- Eggs: 2 large eggs, lightly beaten. Eggs act as a binder, ensuring the coating sticks to the chicken. Adding a splash of milk or buttermilk (about 1-2 tablespoons) to the eggs adds extra moisture and tenderness.
- Vegetable Oil: 1/4 cup (or any neutral-flavored oil like canola or sunflower oil) – this is used to help the coating adhere and provides extra crispiness. Alternatively, you could use melted butter for a richer flavor (about 2-3 tablespoons).
Notes on Ingredients:
- Quality of Chicken: Opt for chicken pieces with good marbling (fat within the meat), as this will render during cooking and contribute to flavor and juiciness. It’s worth splurging a little here! Chicken Selection – This is a placeholder URL for a helpful resource on choosing quality chicken.
- Don’t Overload: Resist the urge to add too many spices. The goal is to enhance the chicken’s natural flavor, not mask it. Spice Guide – Another placeholder for a guide to spices.
With these ingredients, you’re well on your way to creating the most delicious, unbelievably crispy shake & bake chicken you’ve ever tasted! Recipe Homepage – A link to your own recipe (or a suitable external source).
Step-by-Step Instructions: Mastering the Shake & Bake Technique
Let’s dive into creating the ultimate shake & bake chicken – it’s surprisingly simple, yet yields unbelievably crispy results. The key is a precise layering of seasoned flour and spices, ensuring every piece is coated and ready for a hot oven.
Step 1: Prep Your Chicken
Start with about 6-8 bone-in, skin-on chicken pieces – thighs and drumsticks work exceptionally well for this recipe, but breasts can also be used (though they tend to dry out slightly, so consider brining them for 30 minutes in salted water beforehand).
Pat the chicken pieces completely dry with paper towels. This is crucial for achieving maximum crispness, as excess moisture is the enemy. A dry surface allows the flour to adhere properly and prevents steam from forming in the oven, which would soften the crust.
Lightly season each piece with about 1/2 teaspoon of salt and 1/4 teaspoon of black pepper. Don’t over-season at this stage; we’ll build the flavor profile in the coating.
Step 2: Create the Coating
In a shallow dish (a pie plate or baking dish works perfectly), combine the following ingredients. These ratios are key to a consistent, perfectly crispy crust:
- 3 cups all-purpose flour (using unbleached flour adds a slight crispness)
- 2 tablespoons paprika (smoked paprika delivers a richer, deeper flavor – smoked paprika is highly recommended)
- 1 tablespoon garlic powder (garlic powder) – for a robust savory taste
- 1 tablespoon onion powder (onion powder) – adds a subtle sweetness that balances the spices
- 1 teaspoon dried oregano (dried oregano) – a classic Mediterranean touch
- 1/2 teaspoon black pepper (freshly ground is always best – black pepper) – adds a sharp bite
- 1/2 teaspoon cayenne pepper (optional, for a little kick – cayenne pepper) – adjust to your preferred heat level
Step 3: Coat the Chicken
Working one piece at a time, dredge each chicken piece thoroughly in the flour mixture, ensuring it’s completely coated. Shake off any excess flour – this is important to avoid a heavy, soggy crust.
Place the coated chicken pieces on a clean baking sheet. A wire rack set over a baking sheet is ideal for even air circulation and extra crispiness – wire rack is a useful item to own.
Step 4: Bake to Perfection
Preheat your oven to 400°F (200°C). Make sure your oven is properly preheated for optimal results.
Bake for 40-50 minutes, or until the internal temperature reaches 165°F (74°C) and the juices run clear when pierced with a fork. Flip the chicken pieces halfway through cooking to ensure even browning – this also promotes a more uniform crispness.
For extra-crispy skin, you can broil the chicken for the last 1-2 minutes, but watch it very carefully to prevent burning. broiling is a very useful tool to have.
Step 5: Rest and Serve
Once cooked, remove the chicken from the oven and let it rest for 5-10 minutes before serving. This allows the juices to redistribute, resulting in a more tender and flavorful piece of chicken. Serve immediately with your favorite sides – mashed potatoes, coleslaw, or corn on the cob are all fantastic pairings.
Tips & Tricks for Extra Crispy Chicken
Achieving truly exceptional, shatteringly crisp shake & bake chicken is an art, and with a few strategic adjustments to your technique, you’ll master it in no time. It’s not just about tossing the chicken in a coating; it’s about maximizing surface area and ensuring even heat distribution. Here’s how to elevate your shake & bake chicken to the next level:
1. Double Coating is Key: Don’t just lightly coat the chicken once. The first layer creates a base, but the second, heavier coating is what truly locks in the moisture and provides the substantial texture you’re after. After the initial dredge, allow the chicken to rest for 5-10 minutes. This helps the coating adhere better and gives the heat a head start. Then, gently re-dredge in the coating mixture, pressing firmly to ensure every surface is covered. The longer you press, the better the bond will be.
2. Preheat Your Oven Properly: A consistent, high temperature is crucial. Ensure your oven is fully preheated before placing the chicken in. Ideally, aim for 400°F (200°C). An oven that isn’t fully heated won’t generate the intense heat needed for maximum crispness. Consider using an oven thermometer to verify the accuracy of your oven’s temperature – many ovens are inaccurate.
3. Wire Rack is Your Best Friend: Don’t bake the chicken directly on the baking sheet. Placing it on a wire rack significantly improves air circulation around the chicken. This allows hot air to reach all sides evenly, promoting consistent crisping. If you don’t have a wire rack, use a baking sheet with a few small dimples to elevate the chicken slightly.
4. Don’t Overcrowd the Pan: Ensure there’s ample space between the chicken pieces on the wire rack. Overcrowding reduces air circulation and leads to uneven cooking. If necessary, bake in batches.
5. Flip Halfway Through: Flipping the chicken halfway through the baking time ensures that both sides are exposed to the heat source. This is especially important for achieving a uniformly crispy exterior. It also helps to prevent the chicken from sticking to the wire rack. Using a spatula is the best way to achieve this without disturbing the coating. Turn your chicken!
6. Baking Powder – A Secret Weapon: Adding a small amount of baking powder (about 1-2 teaspoons per batch) to the coating mixture creates tiny air bubbles when heated. These bubbles expand and contribute to a lighter, crispier texture. Baking powder adds volume, and that volume translates to a better crunch. Learn more about baking powder.
7. Don’t Peek! Resist the urge to open the oven door frequently while the chicken is baking. Each time you open the door, you lose heat, which can negatively impact the crisping process. Keep an eye on your temperature.
8. Resting Period After Baking: After removing the chicken from the oven, let it rest on a wire rack for 5-10 minutes before serving. This allows the juices to redistribute, resulting in a more succulent and flavorful chicken. Resting allows the chicken to stay moist.
By implementing these tips, you’ll transform your shake & bake chicken from good to extraordinary – achieving a level of crispness that’s simply irresistible. Experiment with these techniques and find what works best for your oven and your taste preferences. Find more recipes here
Serving Suggestions: Pairings and Sides
Elevating your shake & bake chicken experience goes far beyond simply plating it up. The key is to create a truly satisfying meal by pairing it with complementary flavors and textures. Let’s explore some fantastic serving suggestions that will take your shake & bake chicken from a simple dish to a memorable culinary delight.
Classic Comfort Sides:
- Mashed Potatoes: A timeless pairing, creamy mashed potatoes provide a decadent counterpoint to the slightly crispy exterior of the chicken. Consider adding a swirl of garlic butter or a sprinkle of chives for extra indulgence. garlic butter is a common addition, allowing you to easily customize your favorite version. garlic butter sauce is a common addition, allowing you to easily customize your favorite version.
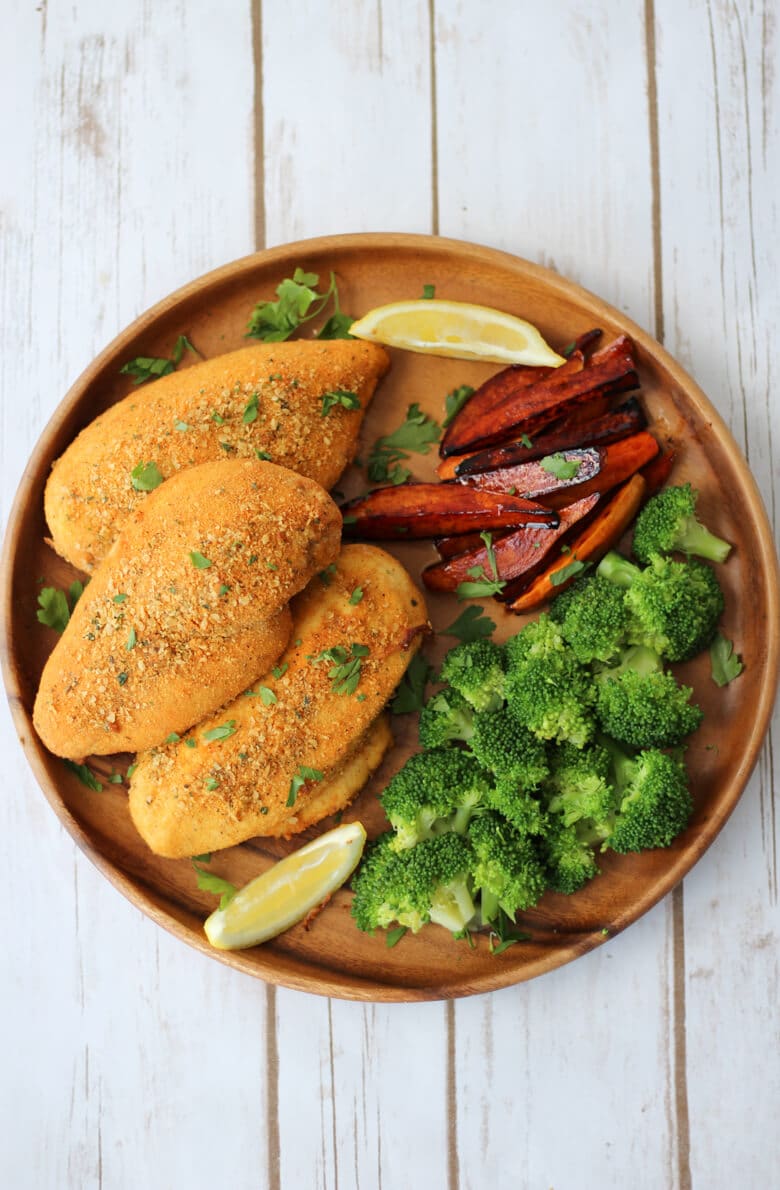
- Roasted Vegetables: Roasting root vegetables like carrots, parsnips, and sweet potatoes alongside your chicken brings a sweetness and earthiness to the meal. roasting vegetables provides a detailed guide to roasting a variety of vegetables, ensuring they’re perfectly tender and caramelized.
- Macaroni and Cheese: The creamy richness of mac and cheese is a fantastic match for the savory chicken. macaroni and cheese offers numerous variations, from classic cheddar to gourmet additions.
Fresh and Bright Accents:
- Green Salad: A vibrant green salad with a light vinaigrette cuts through the richness of the chicken and adds a refreshing element. salad dressing recipes provides a selection of dressings that would work well with this dish.
- Coleslaw: A tangy coleslaw provides a crunchy and flavorful contrast. coleslaw recipes offers several easy recipes.
- Steamed Asparagus: Steamed asparagus, seasoned with a little salt, pepper, and lemon juice, offers a healthy and delicious side. how to steam vegetables is a detailed guide to steaming a variety of vegetables, ensuring they’re perfectly tender.
Global Flavors:
- Rice Pilaf: A fluffy rice pilaf, seasoned with herbs and spices, creates a versatile base for the chicken. rice pilaf recipes provides a wide selection of recipes.
- Mexican Street Corn Salad: Inspired by the classic Mexican street corn, a combination of grilled corn, lime juice, chili powder, and cilantro brings a vibrant and spicy twist. Mexican street corn is a detailed guide to preparing this flavorful side dish.
- Greek Lemon Potatoes: Crispy roasted potatoes seasoned with lemon zest, garlic, and oregano provides an excellent counterpoint to the chicken. roasted potatoes provides a variety of recipes.
No matter your preference, pairing your shake & bake chicken with the right sides will elevate your meal. Experiment with different flavors and textures to discover your favorite combinations. Enjoy!

Storage & Reheating: Keeping Your Chicken Fresh
When it comes to enjoying your perfectly executed shake and bake chicken, proper storage and reheating are key to maintaining that incredible crispy texture. Let’s dive into the best practices to ensure your chicken stays delightfully crunchy – and doesn’t become soggy!
Storage:
- Cooling is Crucial: Immediately after baking, let the shake and bake chicken cool on a wire rack for at least 15-20 minutes. This allows any residual steam to escape, preventing condensation from forming on the chicken’s surface, which can compromise the crispness. Don’t cover it while it’s cooling; leaving it exposed to the air is vital. You can even speed this up by placing it in the refrigerator immediately after removing it from the oven – this is especially effective if you’re prepping for a later meal.
- Airtight Protection: Once cooled, store the shake and bake chicken in an airtight container or a zip-top bag. Remove as much air as possible – this is the single biggest factor in maintaining crispness. If using a zip-top bag, press down firmly to eliminate air pockets. For longer storage (up to 3-4 days), freezing is an option. Wrap the chicken tightly in plastic wrap, then in a freezer bag, and label with the date. Freezing will inevitably cause a slight textural change, but it’s a convenient way to extend the shelf life. For freezing, consider using a vacuum-sealed bag to further minimize air exposure – vacuum-sealed bags are fantastic for this purpose, especially if you plan on making multiple batches of shake and bake chicken. Learn more about freezing techniques to ensure optimal results.
Reheating:
Avoid the Microwave (Seriously!) Microwaving is the absolute worst way to reheat shake and bake chicken. It uses steam, which will instantly soften the exterior, transforming your crispy chicken into a soggy mess. Don’t even consider it! Steam is the enemy of crispness. Here’s why microwave reheating is a bad idea
Oven Reheating – The Best Method: The oven remains the ideal way to reheat shake and bake chicken. Preheat your oven to 350°F (175°C). Place the chicken on a baking sheet lined with parchment paper – this prevents sticking and allows for even heat distribution. Cover loosely with foil to retain moisture without creating steam. Reheat for 10-15 minutes, or until heated through. Check for an internal temperature of 165°F (74°C) using a meat thermometer – find a reliable meat thermometer here. Rotating the baking sheet halfway through reheating ensures even heat exposure. You can also add a few tablespoons of water to the baking sheet, but be careful not to let the water drip onto the chicken. This creates a gentle steam environment, which can help retain some moisture while preserving the crispness – understand the science behind steam.
Air Fryer – A Close Second: An air fryer is a fantastic alternative to the oven for reheating shake and bake chicken. It provides a focused, dry heat that’s perfect for maintaining crispness. Preheat your air fryer to 375°F (190°C) and reheat the chicken for 5-7 minutes, or until heated through. Air fryer recipes and tutorials can provide valuable insights.
By following these storage and reheating guidelines, you’ll be able to enjoy your perfectly crisp shake and bake chicken for days to come! Don’t let that incredible texture go to waste. Explore more delicious recipes to expand your culinary horizons.
Nutritional Information: Calories and Key Nutrients
Let’s dive into the nutritional breakdown of this incredibly satisfying shake & bake chicken recipe. A standard serving (approximately 6 ounces or 170 grams) of our prepared chicken delivers a surprisingly substantial amount of nutrients, making it a versatile choice for both healthy eaters and those simply looking for a delicious and fulfilling meal. It’s important to note that the exact nutritional values can slightly vary based on the specific ingredients and preparation methods used, but here’s a detailed overview.
Calories: Approximately 400kcal. This figure represents the total energy provided by the chicken, considering all the macronutrients – carbohydrates, proteins, and fats. The primary contributor to the calorie count is the fat content, largely due to the breading and any added seasonings.
Macronutrients:
- Protein: Roughly 40 grams. Protein is crucial for building and repairing tissues, supporting muscle growth, and promoting satiety. This shake & bake chicken is a fantastic source of lean protein, making it ideal for post-workout recovery or as part of a balanced diet.
- Carbohydrates: Around 21 grams. The carbohydrate content primarily comes from the breading, which typically consists of white breadcrumbs or panko. These carbohydrates provide quick energy, but it’s important to be mindful of portion sizes, especially if you’re monitoring your overall carbohydrate intake.
- Fat: Approximately 16 grams. As mentioned earlier, much of the fat is attributable to the breading. However, it’s important to note that the fat is largely unsaturated, which is considered healthier than saturated or trans fats. Healthy Fats are beneficial for heart health and overall well-being. The inclusion of some seasonings may also contribute a small amount of fat, but it’s generally a minimal amount.
Vitamins and Minerals:
- Vitamin B6: The shake & bake chicken, particularly when made with whole wheat breadcrumbs, can be a good source of Vitamin B6. Vitamin B6 Deficiency is linked to neurological problems, so ensuring adequate intake through foods like this chicken is beneficial. B6 rich foods provide several health benefits.
- Iron: Contains approximately 3.5mg of Iron. Iron is essential for carrying oxygen throughout the body. Including this recipe as part of a balanced diet, alongside other iron-rich foods such as leafy greens or beans, can help maintain healthy iron levels. Iron Absorption is important to consider when supplementing your diet.
- Phosphorus: Roughly 200mg of Phosphorus contributes to bone health and energy production. Phosphorus Deficiency symptoms to watch out for can include muscle pain and fatigue.
- Potassium: Approximately 400mg of Potassium, potassium is crucial for maintaining healthy blood pressure and nerve function. Potassium Deficiency can lead to muscle weakness and heart rhythm abnormalities.
Sodium: The sodium content can vary significantly depending on the seasonings used. Generally, a typical shake & bake chicken recipe contains approximately 978mg of sodium. Low Sodium Diet is a great place to start if you are watching your sodium intake.
Important Note: This nutritional information is an estimate and may vary. For the most accurate information, consider the specific ingredients and quantities used in your recipe. Nutrition Data is a valuable resource for calculating the nutritional content of food.
Recipe Variations: Customize Your Shake & Bake Chicken
Shake & bake chicken is a fantastic base recipe, and the beauty of it lies in its adaptability! You can tweak the flavors to suit your personal preferences or to complement whatever else you’re serving. Let’s explore some fantastic ways to customize your shake & bake chicken – elevating it from a simple dish to a truly memorable one.
Spice It Up!
- Mexican Fiesta: Add 1-2 tablespoons of chili powder, 1 teaspoon of cumin, 1/2 teaspoon of smoked paprika, and a pinch of cayenne pepper to the coating. Serve with salsa, guacamole, and a dollop of sour cream. You can even incorporate some finely chopped cilantro for an extra burst of freshness – flavor combinations
- Mediterranean Delight: Incorporate 1 teaspoon of dried oregano, 1/2 teaspoon of dried basil, and a pinch of garlic powder into the coating. A squeeze of lemon juice after baking adds a brilliant tang. Pair it with tzatziki sauce and a Greek salad – Greek food recipes
- Asian Inspiration: Blend in 1-2 tablespoons of grated ginger, 1-2 teaspoons of soy sauce, and a pinch of sesame seeds. Serve with stir-fried vegetables and a drizzle of sweet chili sauce – Asian chicken recipes
Herbaceous Notes
- Italian Herb Blend: Use a generous blend of dried Italian herbs (oregano, basil, rosemary, thyme). A little parmesan cheese grated in at the end adds depth. This pairing would be exceptional with pasta – pasta and chicken recipes
- Mediterranean Herbs: Experiment with fresh herbs like dill, parsley, or chives – adding these after baking really brightens the flavor!
Cheese, Please!
- Parmesan Perfection: Incorporate 1/2 cup of grated Parmesan cheese into the coating. It’s a classic for a reason!
- Cheddar Charm: A little shredded cheddar adds a wonderful sharpness.
Sweet & Savory Combinations
- Maple-Bourbon Glaze: After baking, brush the chicken with a mixture of maple syrup and bourbon for a rich and decadent flavor – bourbon recipes
- Honey-Mustard Drizzle: Drizzle with a mixture of honey and Dijon mustard for a sweet and tangy twist.
Beyond the Basics
- Fruitful Flavors: Add dried cranberries, chopped apricots, or pineapple chunks to the coating for a fruity and sweet surprise. This works particularly well with a maple syrup glaze – fruit and chicken recipes
Remember to adjust the quantities of any additions to suit your taste. Don’t be afraid to experiment and create your own signature shake & bake chicken flavor! For more ideas on savory coating recipes, check out different coating combinations
Frequently Asked Questions: Common Concerns Addressed
Let’s tackle some frequently asked questions about our amazing Shake & Bake Chicken recipe – ensuring you achieve crispy perfection every single time. It’s incredibly common to have questions about the process, timing, and getting that ideal texture.
Q: How do I achieve maximum crispiness?
It’s all about heat control and a little patience. Don’t overcrowd your baking sheet; this allows for even air circulation, which is crucial for consistent crisping. Also, make sure your chicken pieces are relatively uniform in size – this helps them cook evenly. For truly exceptional results, consider placing a wire rack over the baking sheet; this elevates the chicken, further encouraging air circulation and promoting a superior crisp. You can find more information about baking techniques like even heat distribution to help you out.
Q: My chicken isn’t as crispy as the pictures! What went wrong?
Several factors can contribute to a less-than-perfectly crispy result. First, ensure your oven is properly preheated – a consistent 400°F (200°C) is vital. Secondly, check the internal temperature of the chicken – it should reach 165°F (74°C) for safety and optimal texture. A lower oven temperature can lead to steaming rather than crisping. Finally, don’t be tempted to lift the chicken pieces during baking; this releases the heat and disrupts the crisping process. You can find detailed information on internal temperatures here – remembering it’s important for food safety.
Q: Can I freeze the Shake & Bake Chicken coating?
Yes! Absolutely. Preparing the coating in advance is a fantastic time-saver. To do this safely, portion the dry ingredients into freezer-safe bags or containers. Label each container with the date and instructions for use. The coating will maintain its quality for up to 3 months. For a deep dive into freezing and thawing techniques, check out resources regarding food preservation.
Q: What if my chicken is browning too quickly on the outside?
This is a common concern, and it usually indicates the oven temperature is too high. Reduce the temperature by 25°F (14°C) and continue to monitor the cooking process closely. Using a thermometer to track the internal temperature is incredibly helpful, as cooking based on time alone can be unreliable. Understanding heat transfer is key; you can discover more about that here.
Q: Can I use buttermilk instead of milk in the coating?
While milk works perfectly fine, buttermilk adds a subtle tang that complements the flavors wonderfully. However, buttermilk contains more acidity, so you might slightly reduce the amount of flour in the coating to maintain the right consistency. The acidity can also tenderize the chicken, resulting in a juicier piece. Explore different dairy options for delicious flavor combinations.
Q: What’s the best way to rest the cooked chicken?
Allowing the chicken to rest for 5-10 minutes after baking is crucial. This lets the juices redistribute throughout the meat, resulting in a significantly juicier and more flavorful piece. Don’t skip this step – it truly makes a difference. You can learn more about resting meats in detail.
Finally, remember that achieving perfect Shake & Bake Chicken is a journey of experimentation. Don’t be afraid to adjust the recipe to suit your preferences. With a little practice, you’ll be enjoying crispy, juicy chicken in no time! You can find further resources about cooking techniques and food safety on the USDA website.